LittleEcoTerrace
I’m Tomás (the “T” in LittleEcoT) and I’m Ele the (“E” in LittleEcoE). LittleEcoE is Engineer and I’m a Scientist, and this is our blog about turning a little affordable cold & damp terrace into something much better on a budget. The house is on a terraced street in York and it was the most affordable option available for us when we looked to get a mortgage to buy our first home. We hope to write about some of the challenges, obstacles and successes we’ve met and are meeting as part of this “eco renovation”, as we believe this is a project many could do as many have done before or are doing… I hope you find it interesting or maybe even useful.
There’s a little more detail here as an introduction to our project. In one line: our project aimed (whilst it was under-way) to turn a typical “D” grade (EPC) house into a “A” eco home for ~10% of its value.
Any comments, feedback or discussion are very welcome!
UPDATE 2016/01/12: To bring the content up to date. Our “LittleEcoTerrace” project is continuing, but life has moved on for work reasons and we are now partially based in London and have started a 2nd project on a flat there (“LittleEcoFlat“).
UPDATE 2023/03/03: Our home for over a decade is now up for sale and its updated EPC awarded it an “A” after a renovation total cost of ~8% of its sale value.
Latest blog posts from “LittleEcoTerrace”:
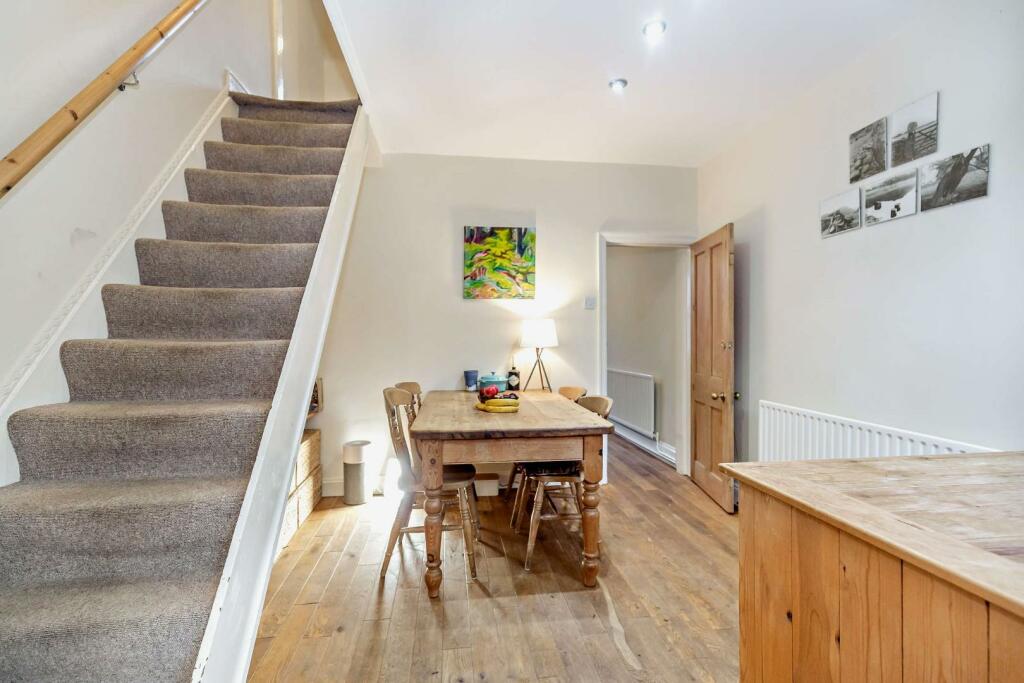
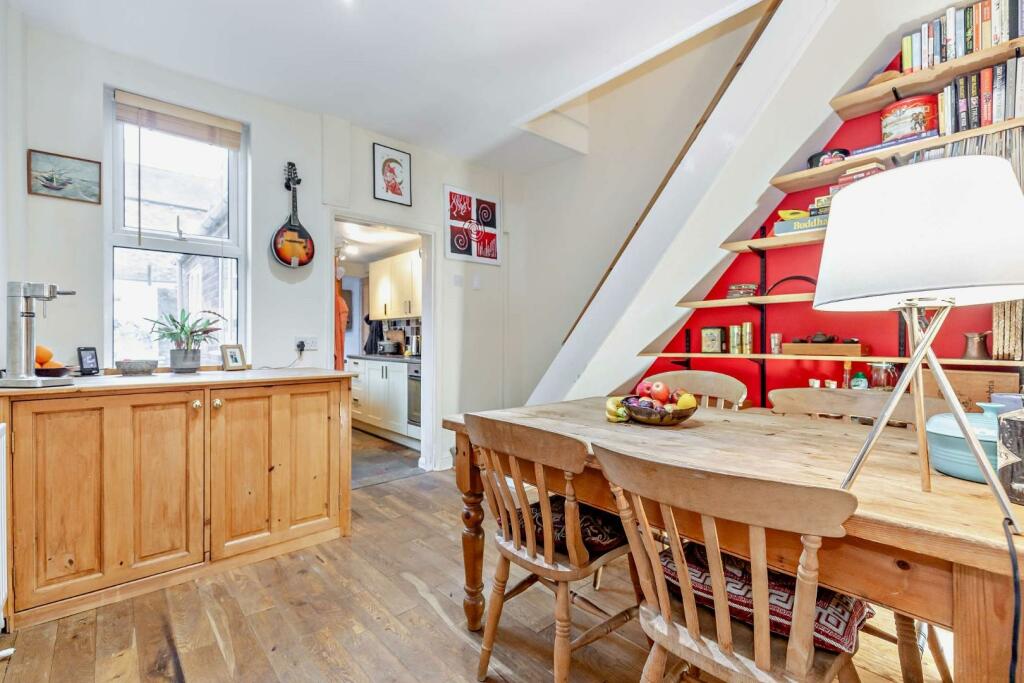
The Sale-iant Details - An "A" rated "cosy home" for sale in York
We don't really want to sell our home, but life and work are moving us on to pastures new. We are in the process of buying a new place with the goal of doing a "self-build" to EnerPhit standard (effectively "passive house" standards on a retrofit). We were surprised at the amount of interest in the sale of our home, which is featured in the local York Press and also the regional press. This is a short post summarising the sale of our home and our recent reassessment of the energy performance leading to the award of an "A" rating.
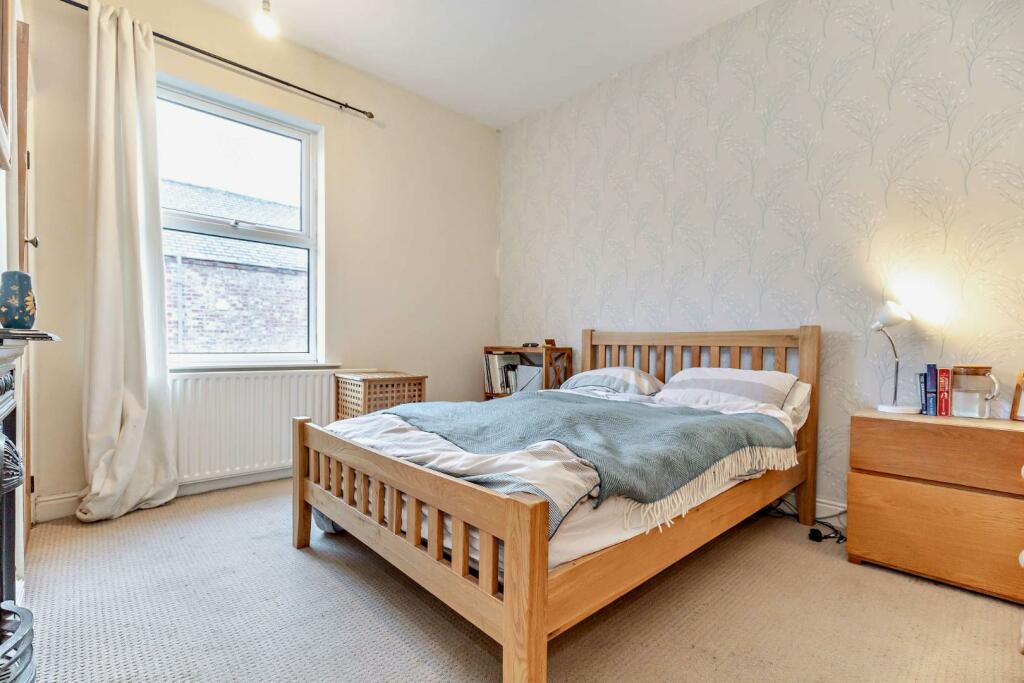
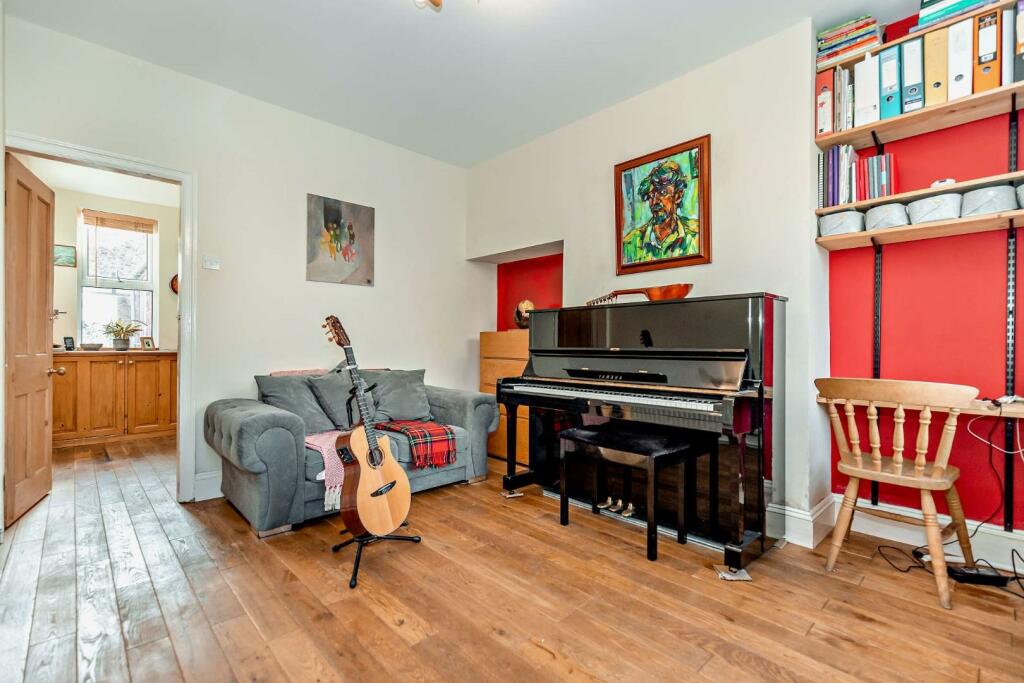
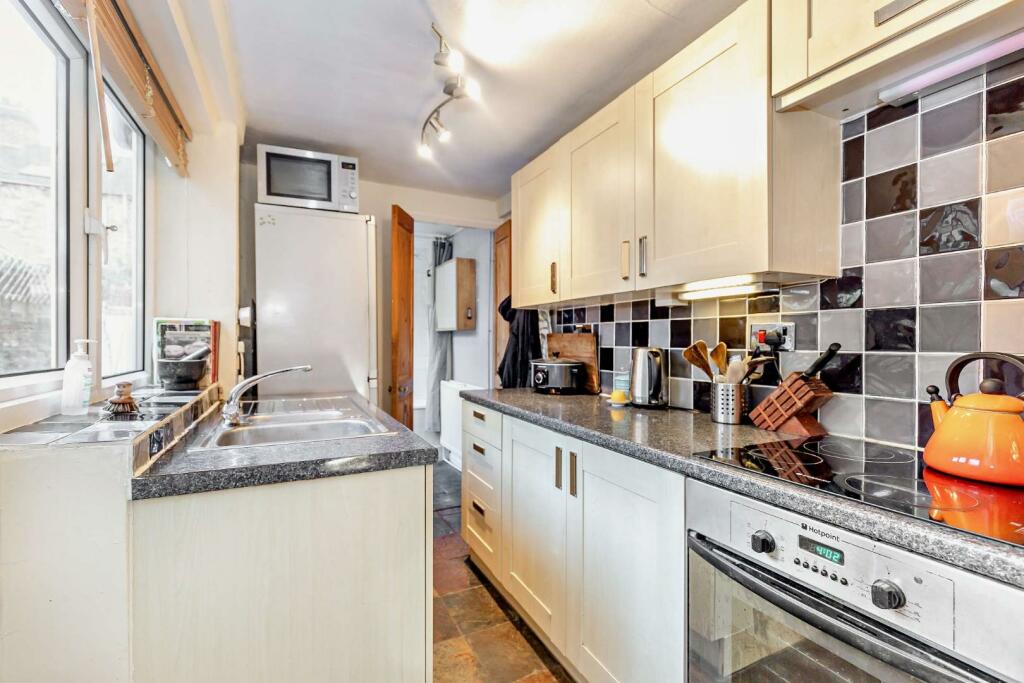
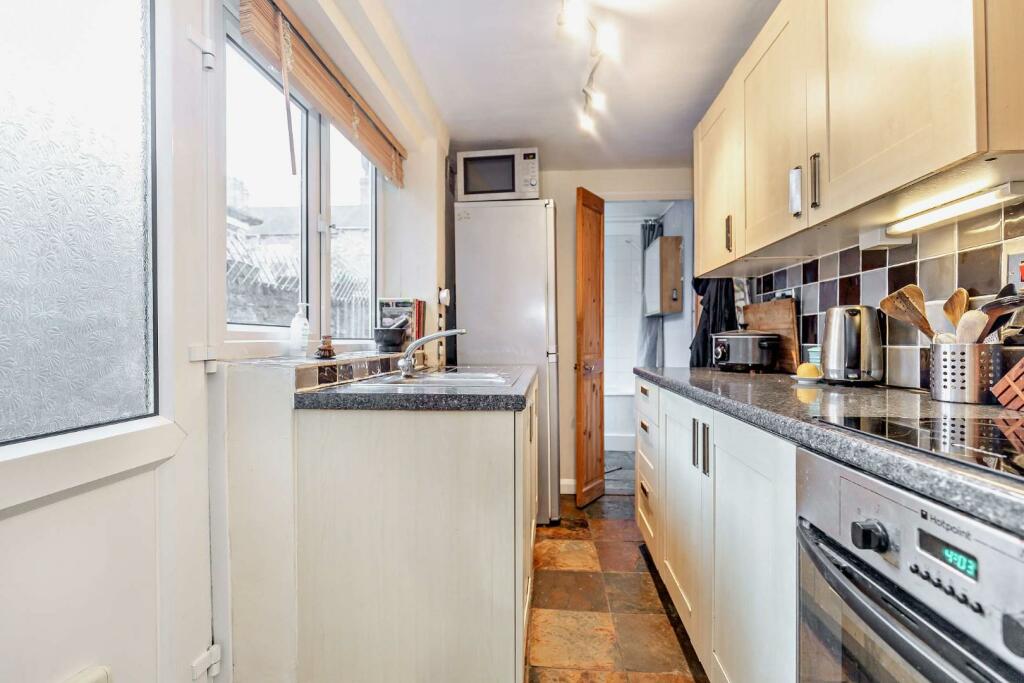
Our "cosy home" is up for sale!
After 15 years of being based in York and over a decade in the first home we owned (via a mortgage), we are selling our cosy little terrace house.
We managed to move the house from a "D" to a "B" for 10% of its purchase value (spend of ~£12k), and then to an "A" for 8% of its current value with a further spend of ~£6k. The 2013 EPC concluded our home already got to an A for environmental performance (In terms of CO2), but getting to "A" overall for the EPC is nice ending to our first eco renovation journey.
Energy Performance Certificate (EPC)
Every house sold in the UK is legally required to have an Energy Performance Certificate (EPC). We had one, but it was from 2013 and we'd continued to work on our home since the last certificate. At every point there were maintenance or ongoing work, we have tried to choose options that would improve comfort and energy performance. This was the same approach that led us to insulate the floor rather than the standard approach of paying for yet another injection of the walls. The main changes since the last EPC were:
- More insulation to loft and boarding out the space between the roof's purlins
- Including the Thermal Conductivity ("U-value") for the floor, instead of just saying it was insulated
- New high-efficiency boiler & Thermostatic Radiator Valves (TRVs) on radiators
- Including the minimal insulation in the 70s extension ceiling in the calculation (shown by borrowing a borescope)
How does the home actually perform?
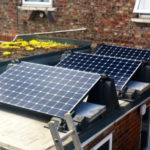
Over the last couple of years, our average energy use has been low, at ~1100 kWh and ~2250 kWh for electricity and gas respectively per year. We aim to use as much of the electricity from the solar panels in the home, including powering two 400 watt oil-heaters for warmth.
The solar produces ~3100 kWh per year or 8.5 kWh per day on average. The solar paid back after ~7 years, with the fairest guess case of ~£19,500 of combined savings and use to date (assuming 75 % on-site use). If we assume 50% usage of the electricity from the panels, the income and savings from the solar is ~£8,000. The majority of this number is driven by the savings from using energy from the solar panels directly instead of grid electricity, which is ~24p/kWh for us currently and a lot higher than the export subsidy (~5p/kWh) or subsidy for microgeneration (~17p/kWh) commonly known as FITs (Feed-In-Tarrif).
What would we have done next?
Going forward, it is obviously entirely up to the new owners what they do with the home. They may choose to do no further changes, which part of me thinks is what I would do in their position.
However, there are still some easy wins available (as well as hard ones!) to make the house have an even lower energy footprint going forward. We were planning to do these final changes, but life has meant we have to sell for us to move forward before we could do them. Whilst we were thinking of staying, we got the lovely Marie and Nathan of Retrofit+ Architecture to do a "whole house assessment" via a local charity called York Community Energy. They helped us identify what our next steps would be.
The cheapest and most obvious next change would be to add more insulation to the extension flat roof. Next would be to deal with the largest heat sink, the floor in the 1970s extension, by continuing the floor insulation and the floating floor into the kitchen and bathroom. This would be the most expensive, most disruptive, and hardest change. After this, insulating the two external solid brick walls of the main house with aerogel (like on the space shuttle) would have been our next step.

Final thoughts?
It has been an enjoyable journey and we have learned a lot along the way by own research, and through charities like York Community Energy, Carbon Coop, and the Association for Environment Conscious Building.
We're grateful to Tom Hocking who was the reporter who interviewed us for the press coverage we've had for the sale and to Sharon Dale who wrote the piece for the Yorkshire Post. We hope that people can look at our stepwise approach and maybe transfer some of the ideas to their own homes as they try to make them cosier and lower their environmental impact.
Links
- Maria Moise and Nathan Froud of Retrofit+ Architecture
- Warmer Homes project from York Community Energy
- Press coverage for sale from York Press ("York property upgraded to slash energy bills - and it's on the market")
- Press coverage for sale from Yorkshire Post ("This clever couple from York reveal how they slashed energy bills and made their terraced home cosier")
- Listing of the home for sale on Right Move and Zoopla
- People-powered retrofit via Carbon Coop
- The AECB (Association for Environment Conscious Building)
Hitting the Wall (Insulation)!
It's been an intense few months for everyone in the UK (and now globally too...), and a lot has changed for me personally too. I've made a decision about "LittleEcoTerrace", and I'm going to do my best to "finish the job" and see if we can make Superhome status. We already moved the house from a D to an A (CO2 via EPC) for ~10% of its value, but I know there are lots of things we can still do that might just be enough to push our CO2 saving to the 60 % required to get Superhome status.
A bit over a month ago, I passed my final exam (viva) on to become a Dr. of Chemistry, for which I focused on atmospheric chemistry motivated by Climate Change and Air-quality. A personal hero of mine is an American lady called Katherine Heyhoe (and she even liked one my of tweets once... *swoon*), who recently publicised a study showing climate scientists' credibility is affected by their actions (insideclimatenews article). I strongly believe this, but I think it is more poignant that if even those who can start to understand the sheer scale of impacts climate is having don't act... then who does?
There are some obvious things that we should be doing for our LittleEcoTerrace project, but we won't as they should have been done earlier in the project if they were going to be done at all. One of these is extending our insulated floor through our 70s kitchen/bathroom extension, another is installing full mechanical heat recovery (MHR). There are some little ideas that might happen in the future too, like putting a light well in at the top of the stairs... But below are my loose plans for work on the house over the next bit. I am very open to any suggestions or comments!
Phase 5 - Doing the bathroom
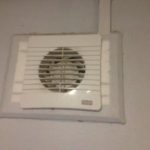
This is the most simple and standard bit of work I want to do. Our bathroom needs some love and most people end up doing this at some point. In our place it has been workable, but not great, since we moved in. We spruced it up a bit with some paint and added the active ventilation (see "Its draught to let hot air escape"). However the whole extension remains hard to heat due to large heats sinks of the floor and ceiling (which I want to tackle in Phase 7). As well as generic aesthetics, I will insulate the (metal) bath.
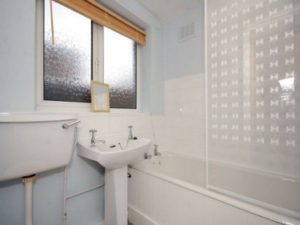
Currently the bath touches two external walls and un-insulated tile floor. It keeps its heat for a mere few minutes. So i intend to move it slightly away from the walls and put some insulation in the gap and around the bath. I want to replace the metal legs with plastic ones to insulate from the floor too. It's been an aim ever since we arrived to one day have a proper hot bath!
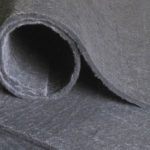
Phase 6 - Insulating the two internal walls
Two of the large heat sinks are the two solid external walls of the old terrace. The simple and cheapest option would be to do external insulation, but we are rather fond of the traditional Victorian brickwork. Therefore we are looking at internal insulation, and one that doesn’t take that much space from the room. The one that we are often recommended is called SpaceTherm. It is a aerogel, like the insulation used by NASA on the Space Station, it is high performing and takes up little space but is quite expensive.
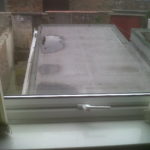
Phase 7 - Insulating the extension
The extension is a massive heat sink in the winter and overheats in the summer. It is very common and most extensions and badly thought out conservatories you see around will suffer from this. To sort this I’m looking into insulating the walls and ceiling. The floor also needs doing (currently just tile on scree), but I can’t do this without ripping out the kitchen that was put in only shortly before we arrived.
The simplest option would have been to put insulation atop of the flat roof, but as we have solar panels there (see blog post “To PV or not to PV“) it would be troublesome. I’m still looking into this and open to ideas. However, currently the winning idea is to attach kingspan inside to the ceiling of the extension. To make this happen I will have to be convinced that we won’t end up with/can avoid condensation.
I also am keen to have a go at doing external insulation, but as we already have the cavity wall insulated this would have less impact. making sure the (flat) roof covers the extra depth of wall might also pose some challenges.
The story before?
Just for completeness and to put the new work in context… here is a brief history of the work we’ve done so far ( inc. previous renovation and “eco-renovation” ). To summarise the changes to the original house to date i’ve clumped together the broad “phases”. Technically some of these overlap, or the timings are mixed between phases, but for the sake of this blog article I will pretend that I had more of plan…
Phase 0 - From the beginning...
Many years after the original (~1899-1902) construction of the 2-up-2-down terrace, a 70s extension with was added to the back. This had no insulation. The house also went through a typical modernisation with electricity and central heating.
Phase 1 - Recent updates to house (up to ~5 years before we moved in)
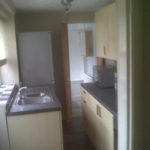
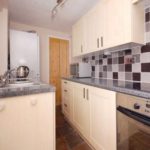
A bit had been done to the house in recent years. Double glazed windows ( not very good PVC )… and I am disappointed by this, especially as the house had a beautiful wooden and stained glass door about ~1 year prior to moving in… However costs limit the ability to replace these and this highlights the need to do things right first time with the large expenses. A new (modern, but non-condensing) boiler was fitted, which unfortunately died within 5 years. And a recently installed IKEA Kitchen. This is the point it was at when we moved in.
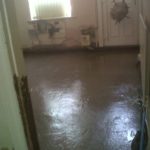
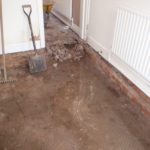
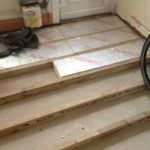
Phase 2 - Floor
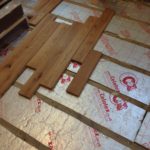
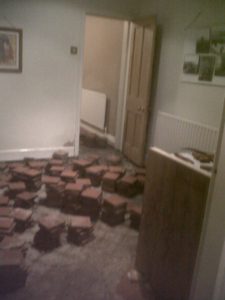
We dug up the whole downstairs floor to deal with a damp problem and added lots of insulation and a new solid wood floor at the same time. (described on blog post “Floored by insulation”).
Phase 3 - Ventilation/Insulation boost
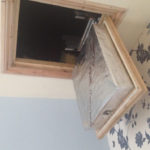
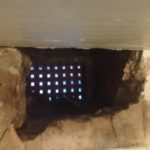
The house was very leaky and poorly insulated. We boosted the insulation in the walls, roof, ceiling hatches, and installed bathroom active extractor at the same time as insulating up all vents (as described in blog post: “Its Draught to let Hot Air")
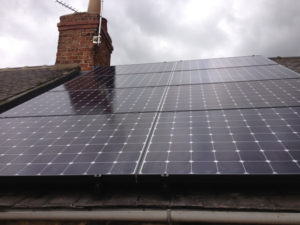
Phase 4 - Added solar panels (PV)
We are very fond of these. They produce ~3.3MWh a year (record so far: 3.53 MWh), which approximately equals the gas from our 1st year in the house and the electricity from the year before we moved in (total: ~3.3 MWh). Nowadays we consume a very variable amount of electricity and gas, depending many people are in house/usage/etc but generally it is a lot lower as we are using energy off the panels. (described on blog post: "To PV or not to PV")
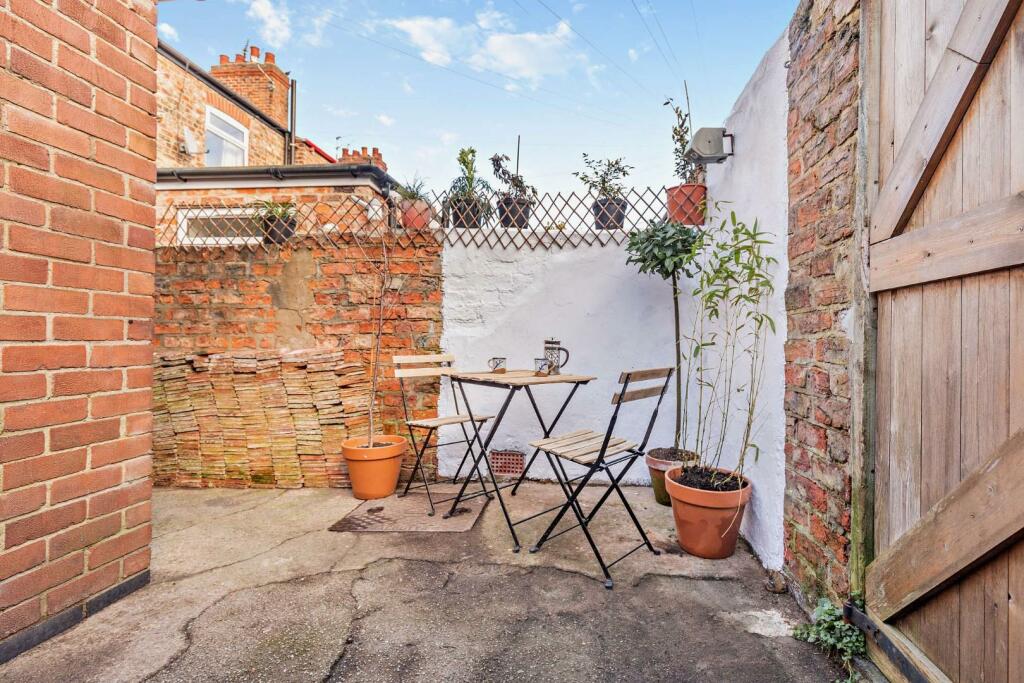
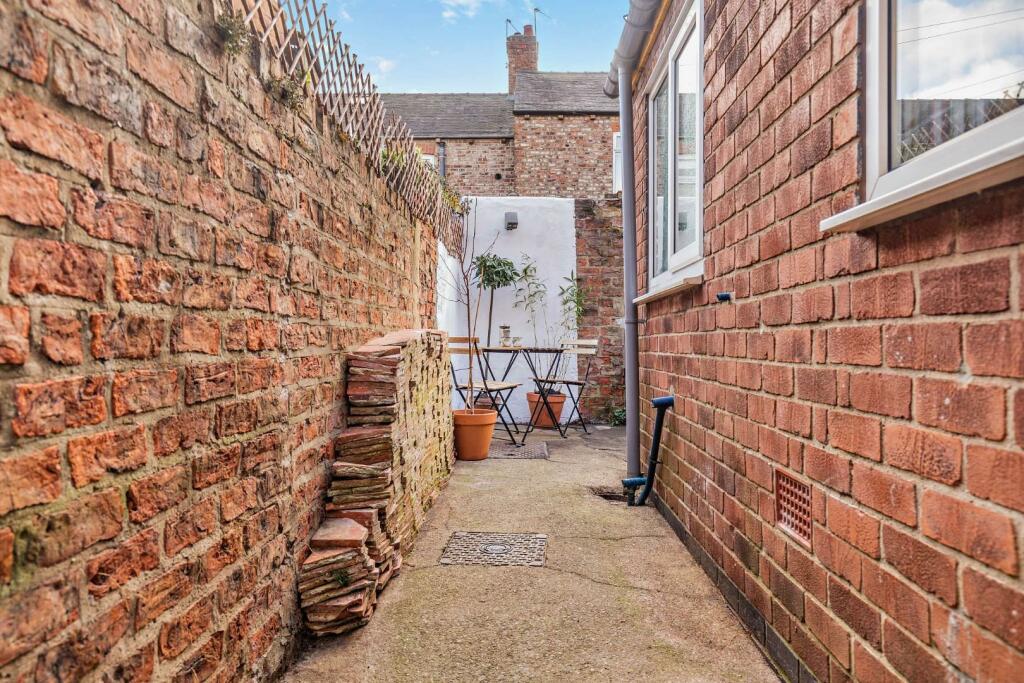
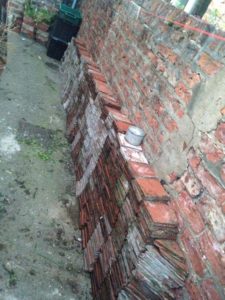
Phase 5 - Yard (Not yet complete!)
An underplayed part of sustainability is lifestyle change. It's not that sexy, unlike fancy tech solutions but it can make a very large difference to a carbon footprint. We are most of the way through redoing the back yard to make it easy to be a base for cycling. So far this has been re-making the shed into a seat, building a bike shelter, and finally we aim to lay the Victorian quarry tiles we took up from inside the house (upcycle!).
Summary
I am not sure whether we will be able to make it to the 60 % Co2 saving requisite for being a Superhome with these savings. My approach to everything so far has been piecemeal and been a big learning journey. I am very keen to reduce the footprint and learn how to do a few things along the way. Whatever happens LittleEcoTerrace is definitely, in a plodding way, moving towards being an “Aspiring Superhome”.
Links
- Huge amounts of information, videos, articles and links etc are available direct from superhomes.org.uk.
- If you like me are working towards reducing your emissions, you can also be an Aspiring Superhome
- SpaceTherm insulation
- A detailed note on SpaceTherm from @Earthnotes
- Detail on the product from the suppliers (Proctor group)
- Mechanical heat recovery (MHR) explained by the guys at Centre for Sustainable energy (CSE)
- External/Solid wall insulation
Hello from "LittleEcoTerrace" & also from "LittleEcoFlat"...
So this is a short little update post on blog posts to come. It's been busy times for me over the last bit and will continue to be for a few months more... but I've still been doing lots of "eco" projects and have several draft blogs I'll be aiming to get posting once work calms down a bit. I guess the big news is that we've started our 2nd eco-renovation project. I'm still doing work on "LittleEcoTerrace" and it will continue to be my main base for the foreseeable future, but now there's a "LittleEcoFlat" too... The reason for this is that my partner got an opportunity to combine her work (engineering) with her love of cycles (and sustainability), but the job required a move to London...
So we did it again, we found the cheapest place we could that fitted us generally and needed some TLC. I didn't really think we'd be able to do that many "eco" things in a flat, as we can't change a lot of the energy systems/building fabric etc. However, it already has shared community heating and we are finding that there are things like sourcing reclaimed flooring, starting a high-rise allotment, getting involved in community projects etc... So although I'm not going to be able to upgrade the place to a SuperHome, but I still think we should be able to do quite a bit and continue working on trying to have lower carbon footprints. Watch this space...
As well as renovating "LittleEcoFlat" there are "goings on" for us in York too, with York Open Eco Homes (YOEH) running again this year and we will be taking part on May 14th (the event is also happening on the 21st). There is a training event coming up on the 7th if you might be interested in taking part or would like to hear from the organisers and those involved last year (summary teaser video here). Aswell as the few bits I have done (like building bike storage etc), I've been daydreaming (and researching) about finishing up some jobs that money or time has put on the back burner. These include tripling installation in the main roof (As well explained by @PostCarbonLife's youtube video) and choices for internal solid wall insulation...
Anyway, I hope you are having a nice start to 2016 and hopefully I'll have time to post project updates soon!
LittleEcoT
"Eco Show & Tell" - YOEH II
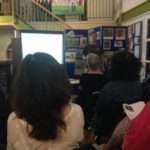
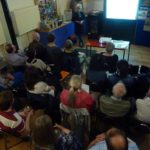
Back in December, York Open Eco Homes (YOEH) and St Nicks hosted an "Eco Show & Tell" where anyone was encouraged to bring items costing less than £50 that had helped make their homes cosier to live in, cheaper to run, and/or more sustainable. The event was a casual evening where successes of smalls items (<£50) were shared. Engaging demonstrations and discussions of how to use and install the items were given, including a energy use of different lights from using an energy monitoring plug showing hugely differing energy use of different types of lights and we even had a lovely cake made in a low energy/slow cooker.
This blog is just a summary of items presented at the event, which you can also find collected on a pinterest board. This will continue to be added to, and all credit and thanks go to everyone who came and brought them along. Please do say if you think of anything that has been missed or you think should be included. Hopefully this list will be of interest to others - maybe some of these items will make your home cosier, cheaper to run, or more sustainable?
This event was the 2nd in YOEH's series of events, following the inaugural event of a talk on "Building Low Energy, Healthy Homes" from local architects (Native Architects). The next event will be a session in April preparing for this year's Open Homes event in York (on 14th and 21st May), with more information to follow in the near future...
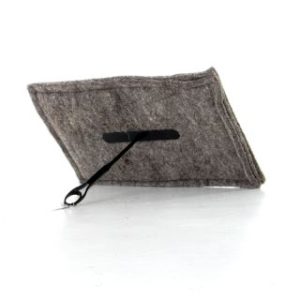
- Chimney Sheep
This item was 1st of the night, and several people including myself expressed interest in trying it for ourselves. The cost is ~£20-35, it is made 100% Herdwick wool and available from ChimneySheep.co.uk. There is lot of information on the website inc. energy loss and money saving calculations or air escaping up chimneys. One obvious advantage over a chimney balloon (see below) is its natural material and thus breathable composition which may help prevent potential build-up of moisture
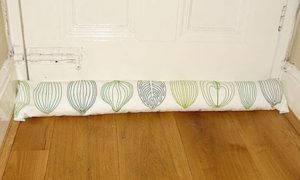
- Door sausage
A way to keep out drafts that many people have used for years. The one presented was bought cheaply (~£6), but it is also possible to make them. Many DIY guides exist online ( e.g. OvoEnergy) and people make different and amusing shapes from snake to sausage dogs.
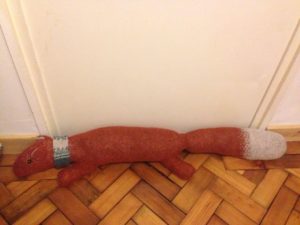
Coincidentally I was actually given a rather impressive and pretty "Fantastic Fox" one for Xmas that my family had made following a Rowan pattern.
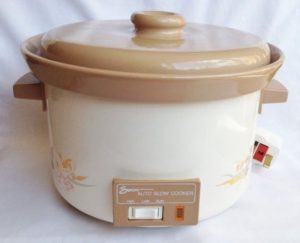
- Slow cooker
This item may have been many people's favourite of the night as a delicious apple cake made in it that day was brought and shared. Slow cookers have a low energy consumption and require a different approach to cooking but with a bit of planning can make almost any dish. Not many people use them for baking but the tasty cake proved that it’s possible too. They are widely available and costs can vary, with ~£25 being typical.
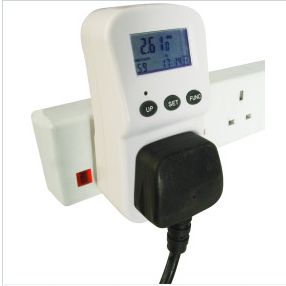
- Plug socket energy meter
This item puts an exact number on energy consumption of appliances at a point or over a period of time. We were given a demonstration of different power requirements of LED, compact fluorescent, and traditional electric lighting which varied widely. It costs ~£10 and is available from Maplins. Interestingly the person who presented the item highlighted that many items he had tested gave unexpectedly high or low readings during use – manufacturers’ labels are not always true to actual running costs.
FYI Another YOEH host has also put together a guide to choosing the right LED lighting, which is well worth a read if you’re planning to buy some or think your existing lights are too dull or bright.
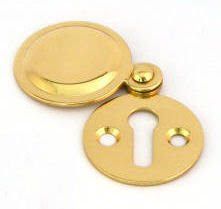
- Keyhole cover
A simple and cheap way of avoiding loss of hot air through key holes (a surprisingly big consideration in Passivhauses). It cost ~£3-5 and is available from lots of hardware stores (e.g. Barnitts in York).
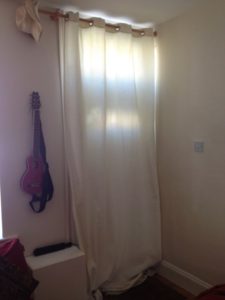
- Curtains/Stopping draughts
A cheap (approx.. £40 for curtains + £10 for pole) option to deal with draughts around doors (and windows). I have a similar setup to the one presented in our house, with a thick curtain over the front door (photo below). As with a lot of terraces in York, the front door leads directly into the living room, so as well as the noise/heat insulation we find it actually improves the aesthetics of the room.
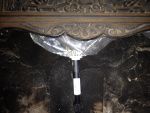
- Chimney Balloon
Another option for stopping loss of hot air from unused chimneys. It differs from the chimney sheep in that it is made of plastic. I have had one for a while now and think it does the job nicely. It cost ~£25 and is available from lots of places, including ecotopia.
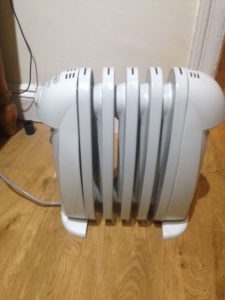
- Electric Oil Heater
This is an item I brought, and it may be counter intuitive. Since our house has solar panels, any extra electricity from the panels can be directed to heat the house through this electric heater. Obviously cost/CO2 savings would differ if power was used directly from grid.
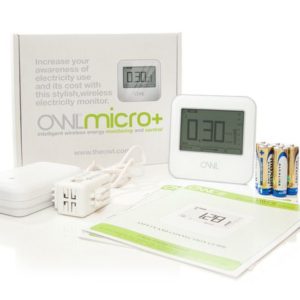
- Energy Monitor (OWL)
For ~£50 or less it is possible to monitor your electric consumption in real time with an "owl". This little device works by placing a magnet around the mains cable into the house to measure the electricity flow. This item gives real time and cumulative whole house energy consumption in money and energy terms, as well as useful info like temperature.
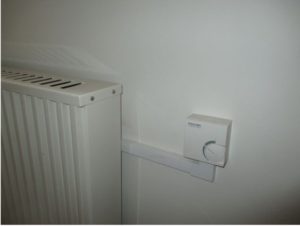
- Thermostatic timers
The first of these just plugs into any socket (and costs only ~£17) and allows for temperature controlled settings of anything plugged through it. The timer is used in a flat with electric radiators, which previously had to be set manually. The second example was wired in to control a radiator without a plug socket.

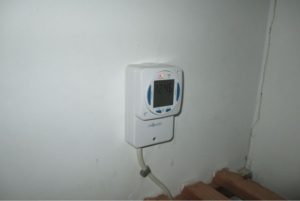
- Immersion heater timer
Energy can be saved by setting a hot water tank immersion heater on timer rather than using a manual on/off control.This "Time guard NTT07 " cost: ~£35.
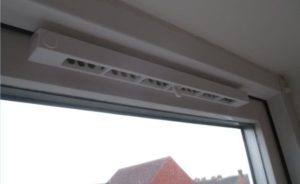
- Trickle Vents
Cheap (~£7) but require careful work aligning the vents in order to prevent damage to windows. It was made clear during the presentation that technical help to install these is recommended if in any doubt. Available from hardware/trade stores (e.g. YorkTradeWindows).
The event was a lot fun and I think everyone who attended got exposed to something new. Hearing about other peoples' experiences with items, including some that I certainly have had less experience of, was a learning experience for me. Do feel free to get in contact if you want more info and I will try and connect you up with information or with the person who presented the item. I will keep adding to the pinterest board (below) and, like other people, am interested in hearing about other cheap but effective items. Please feel free to send/pin suggestions.
Further links
- York Open Eco Homes (YOEH) project page
- The last YOEH event: Eco “show and tell” at St Nicks environment centre
- The inaugral YOEH event: “Building Low Energy Healthly Homes” talk
- The original YOEH Open Homes event last year (More details on Green Open Homes' York website )
- Pinterest board with all the items on from the event, and others that people have suggested afterwards
- St Nicks's Environment Centre and Nature Reserve in York
DISCLAIMER:
These items were presented by individuals and shared here for reference. By inclusion within this YOEH does not recommend use/installation of specific items. Decisions on energy saving are home specific, and if in any doubt please consult relevant professionals/tradesmen.
"Show & Tell" of items (<£50) to make homes cosier, cheaper to run, or more sustainable + YOEH's inaugural talk
First things first: Thanks to Native Architects for giving a great talk last month as the inaugural event of the York Open Eco Homes series (YOEH). It was a insightful talk, followed by a Q&A session with lots of good questions and discussions. Our next event will be a "show & tell" session where anyone is welcome to come along and talk about a item for less than <£50 that has made their home cosier, cheaper to run, or more sustainable.
Building Low Energy, Healthy Homes - A talk from Native Architect's for YOEH's inaugural event
Sally from Native Architects gave a talk with insight into successful eco building projects from renovation to new build. There was a lot of discussion on use and choice of materials. The highlight for me and possibly others in the room, was hearing about eco-building for a bottom up perspective that few people get the opportunity to do. There were many interesting digressions prompted by audience questions including sally highlighting historical lessons from eco-architecture ( for instance cold bridging, even evident within St Nicks' environment centre). Having samples of low energy construction materials (such as Pavatherm and Pavadentro) made the evening a hands on experience!
Topics covered included net CO2 emissions per kg of material. With a nice graph on one of the slides showing how emissions generally led to materials being ordered (in emissions terms): "natural" ( with strawbales etc being negative ) < ceramic < synthetic (e.g. plastics) < metal. The audience was also shown spider charts highlighting how multiple characteristics of a materials should considered ( e.g. breath-ability, thermal conductivity and density) to find the right materials or fairer compare multiple materials. The role of influencers on a project or on product choice was also mentioned ( e.g. salesman, contractors and consumers).
Lots of time was given to successful strawbale projects Native Architects had undertaken (e.g. Bodner House), and lime plastering (including some fun photos of a workshop for stakeholders). The challenges for choosing bio-based construction also were discussed. Namely high profile mistakes, poor installation, lack of individual research into building materials, industry inertia, certification processes (e.g. BBA) and of course cost.
The talk was well received, with good questions throughout. The Q&A session was vibrant with lots of questions on approach and materials. YOEH thank Sally for giving a such a fascinating and insightful talk.
"Show & Tell" - YOEH's next event.
Simply put, there are lot of cheap actions that can be done to make our homes cosier, cheaper to run and more sustainable. However, some of them work better than others and its often experience of lesson learned that we work this out. This is therefore a opportunity for people to share cheap solutions that have worked and maybe could work for someone else. Some ideas could be chimney balloons, compact water butts, energy monitors, small insulation works, etc... I am looking forward to hearing about everyone's items.
I am continuing being told being eco is expensive, which I find bizarre as a lot of the measure I and other York Open Eco Homes participants have done are cheap or they have saved money by doing them (sometimes alot!).
This is event is open and hopefully will allow everyone present to learn from each other. I just ask that you please message me in advance by email(littleecoterrace[at]gmail.com)/twitter etc if you would take part... Personally, I would love to do a talk on using open source motoring (e.g. openenergymonitor), but this is more around to ~£150 so will have to wait for another event. Instead I will talk about my chimney balloon and how to install it. Other items people have volunteered to talk about so far include: draught curtains, a competing "all natural" chimney "sheep", and an upcycled wood cutter.
There are speakers and ideas in the pipeline for future YOEH events, please do contact me if you have any ideas for speakers or events you might be interested in. I look forward to seeing what people bring, and I hope you can make it!
- The next YOEH event: Eco "show and tell" at St Nicks environment centre
- The last YOEH event: "Building Low Energy Healthly Homes" talk
- Native Architects - Local company with experience in low energy building (portfolio)
- from Sally Walker's talk:
- Alliance for Sustainable Building Products (ASBP)
- The Association for Environment Conscious Building (ACEB)
- Mould and indoor air quality consultants: www.buildingforensics.co.uk
- Information on natural fibre insulation for new build or retrofitting - NBT Natural Building Technologies
- St Nicks' environment centre, and how to get there
- YOEH host Randell's guide to LED lighting
