
A #shelfie using lasers – affordable and bespoke built-in shelving
Most the places we’ve rented haven’t had enough useful storage and newer builds seem to getting even worse. Sadly, for hoarders like me, it seems gone are the days of a stocked larder and capacious cupboards. Getting furniture built in is costly, normally because it requires a skilled carpenter or an expensive tailor-made service. We’d very much like a workshop and try to make more ourselves, but with a one bed flat in London it is hard to imagine a way of making that happen…
We have a niche in our flat that, although seeming a great storage space, wasn’t very efficient and really just ended up being a dumping zone. We asked for a few quotes for built-in shelf storage and they were well over a grand (or more…), with quality/approach (e.g. boxes rather than open shelving) scarified to get them even vaguely near our budget. Not to be dissuaded, we decided to build our own at better quality and less than 1/2 the quotes, and try out some new techniques at the same time. The concept was simple: we wanted to have space for a few Bromptons and scaled everything to standard IKEA sizes so we could just fit it off-the-shelf affordable storage from IKEA.
The end result
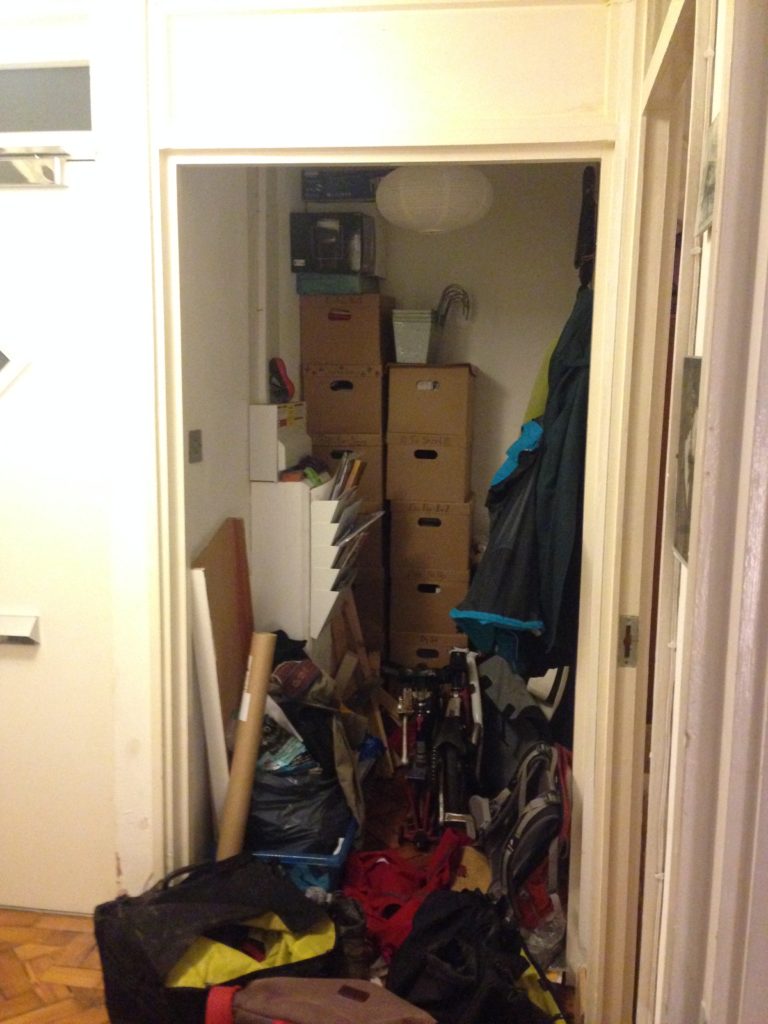
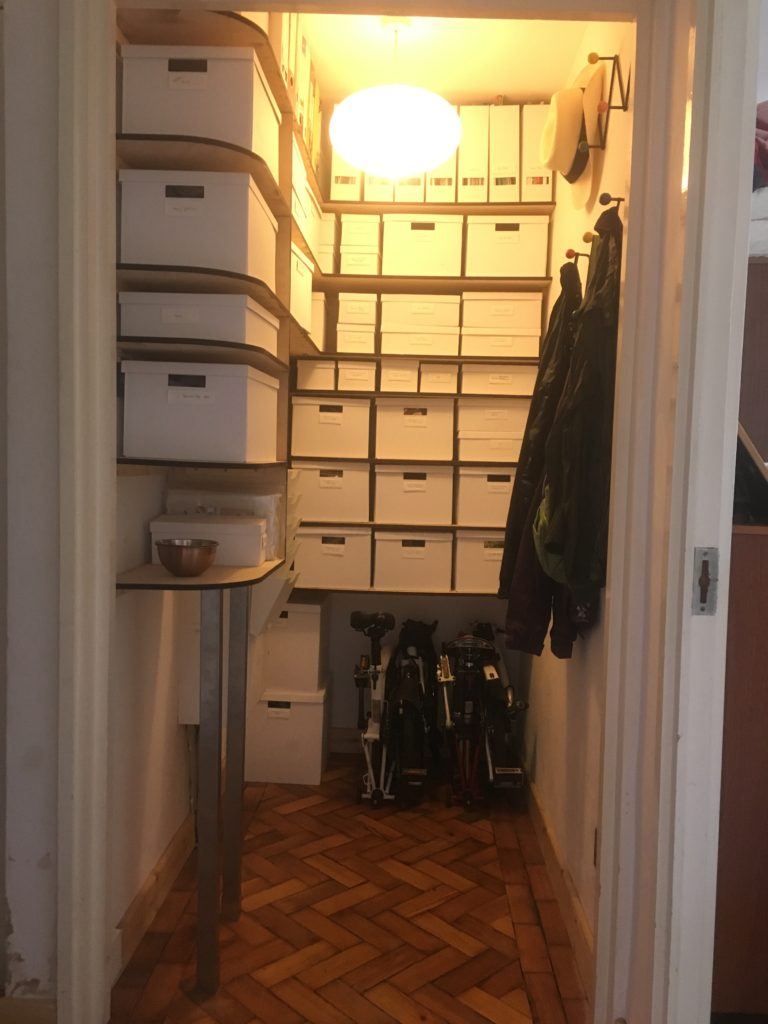
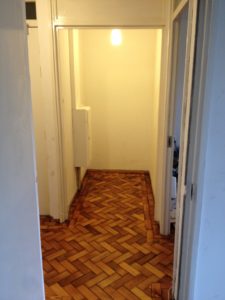
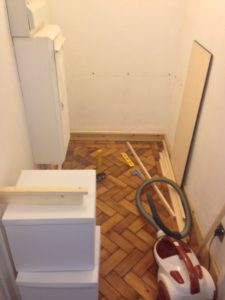
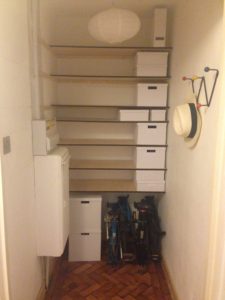
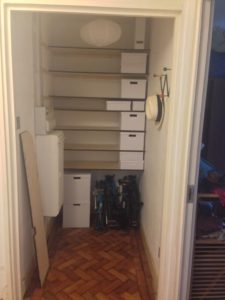
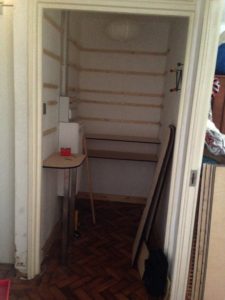
Starting at the end, below (right) is the finished shelves complete with IKEA boxes and two Bromptons in their new home. The below (left) shot from before unfortunately ended up being fairly common for the niche, so there is a real difference now with the new storage shelving.
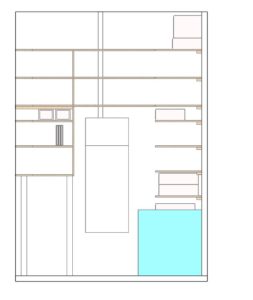
The build is simple. Its just plywood birch wood sheet cut to size and pinned to battens on the wall. We jumped on the opportunity to use a cool technique of laser cutting, as this gave us the ability to have any shape. We used this to give an aesthetically pleasing large radius curve on the front left of the shelving. We also decided to leave the soot of the laser cut edges unfinished as we like the contrast with the white IKEA boxes. Initially, we tried to get a sawmill to just cut to our measurements and that would have been cheaper, but in London we struggled to get someone to take our order (even if websites said they would…). We found the laser cutting service allowed us to neatly cut out slots to clear the wiring channel and other obstacles. The metal legs at the front on the left are from IKEA and so are the white paper boxes.
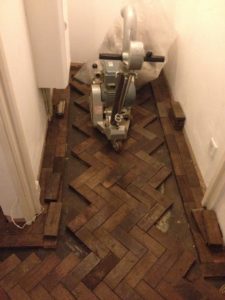
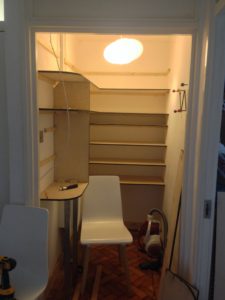
Whilst looking for photos of the shelving I even found a few (below) of the niche earlier on in our renovation.
The build
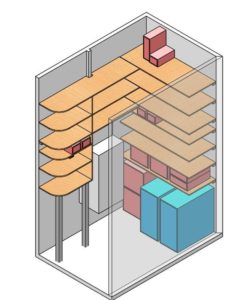
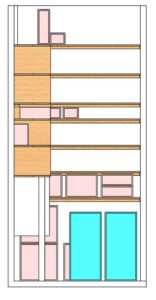
The material we went for was (PEFC certified) 12mm birch plywood chosen for strength and finish. We took lots of measurements (see our tips below), then used some Computer-Aided Design (CAD) software to pull together a design to fit around the space, sizes of IKEAS boxes/Bromptons, and obstacles (wire routing & fuse cabinet). The CAD software we used was Solidworks which costs and we had access to, however on projects since we’ve used software that is available for free (Fusion 360). Below are a few images of the final design.
Tips:
1. Measure really carefully and at multiple heights & depths in case the walls aren’t straight.
2. Simplify your install by slightly undersizing all the shelves – ours had a gap 1/4 the batten width – which allows the shelf to be lined up visually then screwed into battens. This is quicker than having to plane shelves for a perfect fit. Also wood expands and contracts so small expansion gaps are sensible.
3. When deciding the height between shelves remember to allow for the thickness of the shelf above and battens above.
4. Shelves battened out on 3 sides are strong, shelves battened out only on the back like the ones on the left of our alcove have a weak floating corner. We solved this by screwing little mending plates at the join on the underside to discreetly tie the weak corner to the strong shelves.
5. When marking out for battens, pick one area of one wall to be your primary place to measure height, and use the spirit level to continue the marking out round the corners. This will keep your shelves level even if the floor is not.
Once the plywood arrived, we started battening out the support for the shelves. For this we just used cheap Wickes’ Whitewood PSE Timber – 18 x 28mm x 1.8m.
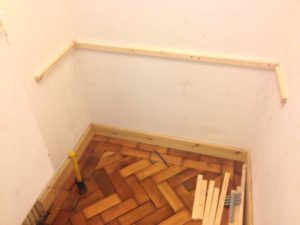

This part of the job took a long time as all the screws needed rawl plugs into the masonry. We also finally got around to buying a wire/metal detector, which we should really have got sooner in our DIY exploits…

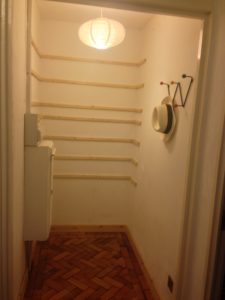
The left hand wall was definitely the most challenging bit. The fuse box and old metal cupboard could not be moved or altered. The lack of a wall at the front, meant the shelves needed legs for support. After looking online, we saw that there were lots of options but that IKEA’s kitchen leg look nice and was very well-priced (£16, IKEA UTBY).
To finish, the extra shelves were put into the lefthand boxed out section. These are resting on internal battens on the plywood upright box section and use “cheating corners” (Wilkinsons’ Fixit Blocks) to hold in place. Mending strips (two per shelf) were added to join the back and lefthand shelf sections.
We are very pleased to have rearranged this space so that it supports us using cycling as our main transport with somewhere to store our bikes conveniently, and so that we can tuck away all the bulk low-plastic household goods we get from Suma (as we’ve blogged about before).
Next projects
We’re very fond of our new built-in shelving, and decided to do bookshelves in our lounge that would gain us floor spaces and be affordable too. For this we decided to take a different “IKEA-hack” approach & i’ll pull together a blog on it soon.
Links / the gory details
In case any of this is of interest, the table below gives links for what everything cost and where we bought. In total it was ~£430. None of these links are affiliated.
- Laser cut Birch plywood from CutLaserCut (linked)
- wood: ~£170 – 12mm birch plywood (linked)
- laser cutting: ~£170 (charged per cut)
- Metal support legs: £16 (x2) – from IKEA (UBTY, linked)
- Light shade: £5 – from IKEA (SOLLEFTEÅ, linked)
- Atomic coat hooks: £20 – from a London furniture flea market (linked)
- Batten wood: £17 – Wickes (Whitewood PSE Timber – 18 x 28mm x 1.8m, linked)
- Fixit blocks: £2.5 (24 pc.) – from Wilkinsons (linked)
- Mending plates: £0.75 (each) – from Wilkinsons (linked)
- Generic screws and rawl plugs: ~£10
- The white storage was additionally bought from IKEAS’ TJENA range (£1.5-£3.25 each)