LittleEcoFlat
For work reasons, my partner and I are now based in two locations: York and London. We’ve ended up in a flat this time, which offers different challenges for those trying to live in a more “eco” or sustainable way.
I posted a quick introduction when the work had started to get somewhere. Essentially the place we’ve ended up in is like what a lot of people in London live in (Similar in some ways to when we moved into a little 2 up 2 down in York), so maybe some of the things we find along our way and our forays may be of interest or even work for you…
Blog posts from “LittleEcoFlat”:
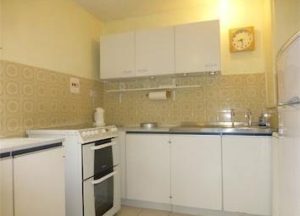
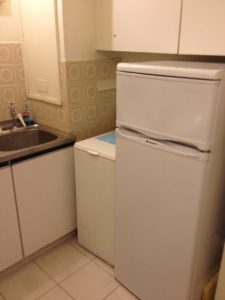
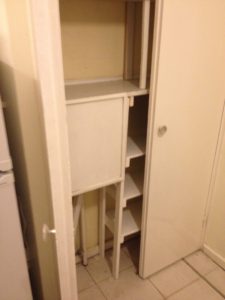
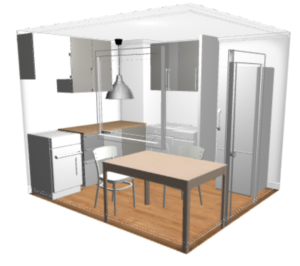
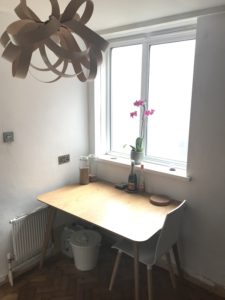
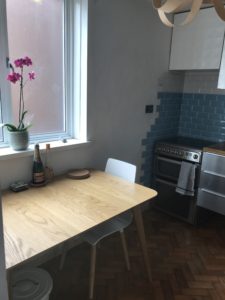
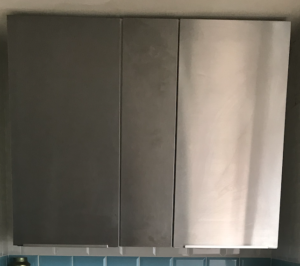
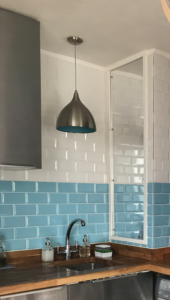
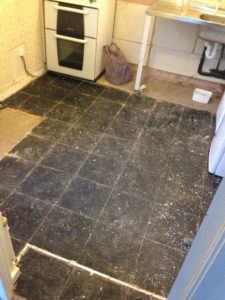
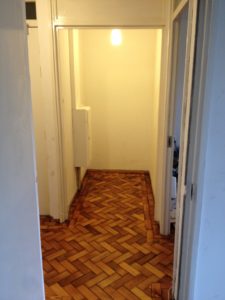
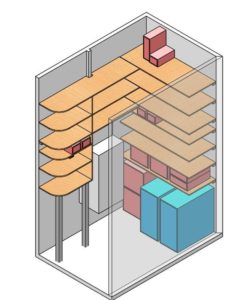
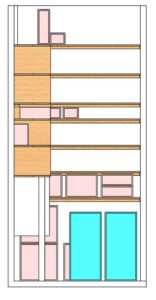
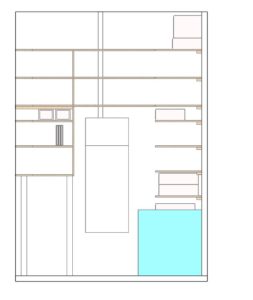
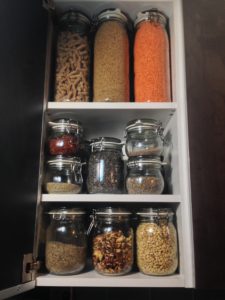
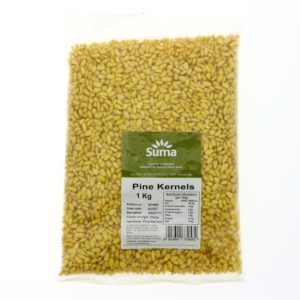
LittleEcoE has been a fan of Dave Goulson since being lent “A Sting In The Tale” by family. Last week he gave a talk for Herts & Middlesex Wildlife Trust, so LittleEcoE bumbled over from London as our roving bee-porter. The talk, based on his new book “The Garden Jungle: or Gardening to Save the Planet” was fascinating and enjoyable. As both an academic researcher into bees and a science communicator, Dave Goulson was able to include some excellent and at times hard-hitting detail on the sheer scale and importance of the biodiversity crisis, but blended this with enchanting tales from the lives of the wonderful bees, flies, beetles, butterflies, and bugs that make up the majority of the Earth’s biodiversity. The talk explained some practical and effective actions we can take in urban gardens to support our pollinator friends. Given that LittleEcoE would heartily recommend getting the book, we’ll avoid drone-ing on too much so we don’t spoil it for you. But here are our 5 favourite tips from Dave Goulson, with us rating our efforts on each: If you leave it as long as you can bear it, you’ll discover your lawn has all sorts of flowering plants you wouldn’t expect in it. Reclassify “weed” flowers as wildflowers and try to relax about it looking untidy. Soon bees will be buzzing amongst your clovers and dandelions. LittleEco score: Bad We cut the grass on paths at our allotment regularly and dandelions are always de-headed. Unfortunately, this is site policy and not likely to change any time soon. We want to be good allotment neighbours so we take our turn on the mower! Any space from flowerbed to windowsill can help. Think old English cottage garden - lavender, borage, foxglove etc. Choosing native over non-native is a sensible idea in general but needn’t be rigidly policed. Indeed some extremely good choices for bees, like blue tansy (phacelia tanacetifolia) are non-natives! Flowering trees like lime add a 3D element so there’s more flowers in a small area. LittleEco score: Excellent In our herb bed the lavender, rosemary and mint flowers are often buzzing. We use phacelia tanacetifolia as overwintering green manure, loved by both bees and the allotment fox who thinks it's his fluffy mattress. We got a surprise this spring: we let some of our earlier purple sprouting broccoli plants go over into flowers but left the net on top to protect the main crop against pigeons. Next time we lifted the net we were aghast to see dozens of “dead” bees dotted all over the broccoli until we realised they were actually asleep! It turns out if bees find a food-rich area protected from birds, solitary species, in particular, will have a snooze. There is something deeply heartwarming about a bee deciding to take a nap on your broccoli. Whilst you may need to have a basic awareness of pollinator-friendly traits in plants, nature loves variety. The more plants you provide, the more creatures will find just the right food or shelter at just the right moment. The big thing to keep to a minimum is double flowers - any flower with two rings or more of petals - because these are bred for looks and have little to no nectar or pollen. LittleEco score: Good We go for a lot of variety on the allotment, and the few purely ornamental things we have are mostly singles, the one exception being LittleEcoE’s double tea rose which is both a visual and olfactory indulgence. Unfortunately, the plants you see in garden centres with “Perfect for Pollinators” logos are often raised on insecticides; in a study Dave Goulson led in 2017, over 70% contained neonicotinoids in the nectar which is a potent neurotoxin to bees. So it’s better to raise from seed or trade with a neighbour or friend, then you know the plant won’t be accidentally poisoning the pollinators you’re trying to encourage! In the same vein, if we want to keep our pollinators healthy we have to use no, or drastically fewer pesticides. Have confidence if one pest population gets high in your garden, with time the ecosystem will correct and you’ll be visited by interesting predator beetles and birds who’ll keep your pests under control for free. LittleEco score: Good We have never used any type of pesticide on our plot, we also avoid artificial fertilisers and peat. To be honest we wouldn't know what we were doing with pesticides even if we had them as we were both brought up by organic-gardening Mums. We do struggle with sudden fluxes of aphids and slugs which make our yield dip and don't seem to attract as many predators as we'd hope but such is life. We grow from seed these days, but when we were newbies we bought some plugs including the herbs the bees love the most so now we're worried those probably had insecticides in them. We just have to hope they're giving clean nectar now. Side note: The biggest shock of the talk for LittleEcoE was learning the most popular flea treatment for pets is a neonicotinoid and it’s applied in a recommended dose so huge that each treatment could kill the equivalent of 18 million bees. Neonicotinoids are also toxic to pets and humans, and although the dose is far below the level that could cause acute exposure symptoms in humans, it’s likely the treatment gets rubbed off on many surfaces in the home and garden. Your garden is now the place for bees to be. Why not invite them to stay over? But rather than go for a hive and increasing the already-high population of honeybees, you can help wild bees have a place to stay. Solitary bees love holes 8mm in diameter drilled deep into wood. You can also buy pre-made solitary bee houses with trays, or with bundles of hollow bamboo and twigs. Bumblebees don't generally stay in constructed homes at all, but might make their own if there are secluded wild spots in your garden. Hoverflies are also very diligent pollinators and you can make sanctuaries for their larvae by leaving out buckets of water with organic matter (twigs etc) to rot down in them. LittleEco score: Excellent! LittleEcoE is the proud owner of a solitary bee house, kindly given as a birthday present and placed on a sunny south-facing shed wall. This one has trays which can be cleaned out if needed gutepotenz.de. 9 of the holes have clearly been adopted by mason bees, as you can see the clay plugs on the outside. Inside there will be many clay chambers, each one containing a food-store of pollen and one larva. We were delighted to be their AirBeeNBee hosts and are planning to add more homes next year. ALLOTMENTS!!! One thing we like almost as much as trying to be eco is saving money! When we moved into LittleEcoFlat it was clear we were going to have to redo the kitchen. Here's the story on how we did that for under £5k instead of the going rate (£12k-£15k) - perhaps there are some tips here that might help you out too? The kitchen was still in its original configuration from when the flats were built in the 1970s. The appliances were dated: the cooker was an electric coil of the old type that you have to switch on 10 mins ahead to warm up the ring. The fridge was working but very old and a low-efficiency rating. The washing machine was a top loader with a huge drum, meaning a lot of water got wasted for a normal-ish wash, and again old and low efficiency. The space was set up with cabinets on all 3 sides, making a narrow space for one person to stand in and cook. We like to share our cooking and talk whilst we're preparing food together so we wanted a more social layout. The space is small so achieving that plus enough storage and room for the appliances was quite a challenge. We also found there was a lighting problem; the kitchen window faces south-east and gets decent light well into the afternoon, however, it's the only window in the flat which points directly towards the rest of the flats, so the previous resident had put up a roller blind for privacy. This combined with a dingy-ness from the crowded cabinets and some very 70s brown tiling meant you'd end up with the blind down in the daytime and the lights on! Finally, we did an unconnected bit of investigating and noticed we had some very old electrics (we're talking wound-wire fuses). An electrician confirmed that our service unit needed upgrading, and also told us that all the kitchen sockets and appliances were daisy-chained off one supply line and this needed correcting, so we knew we'd do that at the same time We knew we wanted to ensure we had high-efficiency appliances but we had no particularly unusual requirements so we started off by getting quotes and prices in from the normal places you'd try: in particular we looked at Wickes, IKEA and John Lewis, and we spoke to friends about prices at Howdens, Wren and many others. We established the price for an "all-in" fitted kitchen would be in the region of £11k-£13k if we chose fairly mid-to-low range options for everything. That includes units, appliances, fitting, plumbing, and really basic electrics, but we'd also need to cover the additional electrical work to route in another supply, and the tiling, which would be another £1k-£2k. Now, £12k-£15k to redo a single room was already a pretty daunting number to us, but we were also finding ourselves very underwhelmed with what was on offer. We did the "full works" consultation with the in-store kitchen designer person, and what they were offering was a fitted kitchen, supposedly the height of desirability. But the resulting 3D computer illustration was bland and uninspiring, and the layout was having items shoved into it based upon an assumption of a much larger kitchen meaning it did not provide features we wanted. We'd decided we'd really like to squeeze in a small dishwasher and some drawer units if we could, but this seemed to add expense to the fitted kitchen quote because our funny-shaped kitchen was not a good fit for this template approach. We decided that there must be something better out there and that we should look at making up our own pick-and-mix solution from different sources. The starting point was to understand the space we had and how we broadly wanted to lay it out. We’d already ripped out the old kitchen in the process of other work so we had a blank slate (see previous post on: "Pining for a warm floor"). We measured the shape of the walls, including an odd column in the corner which carries a lot of our pipework. We used IKEA's 3D Kitchen Planner to model the main areas of the kitchen; this is free to use and basic but good for playing with ideas. For a more complex area of the kitchen shelving, we made a 3D model on Solidworks, because we have this available, but you can also do it for free on Google Sketchup or Autodesk Fusion. Having this model was particularly useful to us because our 70s-built flat has a kitchen based around imperial-size base cabinets, meaning the switch to metric left funny slivers of space unfilled and needed some mucking around to use space efficiently. Having it all on the computer made this tinkering much easier than trying to do it with a tape measure in the room itself. We worked out the rough layout we wanted was a main run along the back wall, consisting of oven/hob, worktop, and sink, and a second area at the side alcove. This would make a good space for food preparation, with the washing machine and dishwasher underneath. We would fit wall cabinets for space, but to avoid making the room feel small they’d be tall and shallow. We’d leave the area above the sink open all up to the ceiling, avoiding the feeling that the person washing up is crammed in, and meaning we could use the second lighting point without modification. We decided to rip out some cupboard doors and shelves near the door - this was screening off some big ducting for the air extraction but it wasn’t providing effective storage space. We worked out we could put the fridge there and build some new, open shelving for storing dry foods, as long as it had gaps cut out to fit around the pipes well. Next to the fridge would be our recycling area. The rest of the room now opened up for a small table and two chairs under the window. Getting to this layout evolved through different stages, and we spent a lot of time thinking about how we use kitchens we’ve had in the past. For us we realised our kitchen is ideally a very social space because we like to spend time chatting and cooking together, so having a “cook” area next to a slightly separated “prep” area was appealing; often when we’re making food together one person is stationary chopping veg and the other is moving around between hob/cupboards/sink. This worked well allowing us to be out of each other’s way but still able to chat easily. We definitely recommend thinking about what day to day living in the space will be like for you and using that to guide the layout. The first savings we unlocked was by moving away from a fitted kitchen toward a pick-and-mix approach. This meant having some units, but a standalone oven/hob and standalone appliances. We were actually keen to trade off the clean, hidden-away aesthetic of fitted appliances, which we found a bit clinical, in return for a bolder aesthetic. We decided we liked the stainless steel look and would pick a similar finish across the units and appliances. By having them bought separately, but keeping a similar visual component, it meant we could get the best price on each item yet the finished kitchen still looks like a cohesive space. We looked at cheap sources and the best options we found were Units Direct and IKEA. If anything Units Direct are the cheapest, but IKEA is a good option on both costs and on their wood sourcing. They make sure none of their wood comes from Intact Natural Forests (INF) or High Conservation Value Forests (HCVF) unless it’s certified as responsibly managed. IKEA had the Grevsta stainless steel doors we liked and made lots of different sizes/configurations which allowed us to fit metric cabinets into an Imperial-measure space. It’s also easy to get spares and repairs in the future. We went away from down-to-floor cabinets with kickboards and extra face panels to seal off every corner. Partly this is a legacy of our frustration with kitchens in rented houses and trying to clean them when cheap partly damaged panels are stopping you brushing up properly. Partly it’s because the flat is done in a mid-century modern style (e.g. the parquet floor we put it on a previous blog post) and we thought having stainless cabinets on stainless legs would fit in really nicely. When the base units and cabinets came we put them together and installed them ourselves. We love doing a bit of flat-pack assembly of a weekend, and these ones were quite straightforward. We drew up some laser-cut custom shelving for the niche - a project linked to our Shelfie using lasers blog post - to fit around a fridge. This was in birch ply and came to about £150 we think, but it’s a bit tricky to separate out costs since it was done in with the alcove pieces. At the same time, we got a piece of mirror acrylic laser cut to replace the old wooden ducting cover - see picture above. This was a cheap way to get a mirror into the darkest corner of the room and brighten it up. The overall cost difference is truly staggering - the IKEA shop for all the “furniture” - base units, legs, drawers, wall cabinets, doors, fittings and handles - came to £779. Even including those shelving costs of £150, that’s a total of £930, a saving of 71% compared to the £3253 we were quoted for the fitted kitchen option. We set ourselves a criterion that every appliance had to perform to an excellent standard on energy ratings. We also prioritised energy use for which appliances we chose, to avoid installing an energy-guzzling kitchen. Oven, fridge-freezer, and washing machine we viewed as essential, dishwasher we thought of as a luxury until we found out they can use less water and energy than hand washing, in either case, we both hate doing the dishes so we definitely wanted it. A tumble dryer was definitely out of the question as these are a big energy drain. Instead, we put up hooks in the living room to put up a washing line on laundry day (LittleEcoFlat doesn’t have any outside space). Then, we needed each appliance to fit the space available. This narrowed down the field instantly, because we had a tight space. For the dishwasher, we needed a slimline version to make it fit in, and there were not many options. For the fridge/freezer, finding a single not-huge fridge was surprisingly difficult as the market appears to have seized upon double door American-style fridges with internet connected ice makers etc., meaning even many of the single units were much wider than the old fridge/freezer had been. For the oven, we wanted induction hob, although we were not very interested in any other tech gadgets (pyrolytic cleaning, slide-in doors). Induction hobs are great to cook with as they are as responsive as gas and highly efficient. Finally, we wanted all the appliances in a stainless steel grey finish. In order to keep costs down, we checked our employee benefit/discount schemes. Usually, these are little-known and a bit gimmicky but they can make a big impact on big purchases like this and both of us found we had some discounts. LittleEcoT’s educator discounts beat mine; he gets 45% off Hotpoint/Indesit/Whirlpool group appliances. This literally saved us several £100s so if you’re in employment, particularly if it’s something like academia, we’d really recommend asking colleagues or HR if you’re eligible for anything like this. Through this discount, we got an A rated oven, A+++ rated washing machine, and A+ rated dishwasher. We couldn’t find a fridge-freezer from that source that was the right size to fit in the alcove and instead got an A+ rated Hoover one. Overall our high-efficiency appliances cost £1312, a saving of 45% compared to the £2399 we were quoted for entry-level options with the fitted kitchen. We were concerned to make sure the old appliances were disposed of properly. Happily, manufacturers of new appliances will take your old ones away for a minimal fee and sort them out properly. We did this for the oven, washing machine, and fridge, meaning those old ones are now either recycled in a WEEE compliant fashion, or in some cases these schemes give old working appliances to low-income families. Choosing which way to go with worktops took a while. We were cautious of marble-effect resin laminated chipboard which can crack, swell or peel if it’s not fully sealed. But stone or materials like Corian were above our price range. On the original fitted kitchen quote, we ended up going for a higher-spec resin option where the coating is quite thick so it lasts well. With the fitted kitchen options a marble or stone look seemed to go with it, but once we were looking at our stainless steel idea it seemed much better to go for wood, we liked the warmth and colour it would bring. Solid wood worktops are a great deal cheaper and they’re nice and strong, but they do then need some care and thought. A wood worktop needs trivets/heat pads under hot pans, and can’t have water left sitting on it else it’ll blacken. It needs re-oiling every few months. Personally, we’re happy with the trade-off. Two sources we checked for worktops were IKEA and Worktop Express. IKEA came out quite cheap, but a colleague had just got their worktops done with Worktop Express and they were even better, offering thick FSC European oak custom worktops at a really good price. Part of the cost for worktops is “templating”; walls are rarely as straight and flat as they appear, and measuring up for a piece of stone or resin to fit exactly is a tricky job. It’s normally done after base units are in. In this case, I measured up for our worktop before base units went in and didn’t use a templating service. This meant taking a lot of measurements very carefully, working out exactly how the walls taper. I also took advantage of the wood upstand being quite thick to conceal a deliberate gap between worktop and wall on all sides, partly for expansion and partly to allow for any measurement inaccuracies. I then drew up exactly what we needed as engineering drawings and sent it to Worktop Express, who were very obliging about working to those rather than their online quote system. Since doing this used some professional experience, I wouldn’t advise doing your own template lightly, but for us it made sense and there was a pleasing moment when the finished worktop slid into place in the alcove just as planned. Fitting the individual sides of the worktop was pretty easy, the oak is a bit hard to get screws into but one side was straight on to base units, the other on to battens on 3 sides, all fairly standard. The tricky bit was getting the chamfered point where they met fixed down well. Getting heights consistent was a mission and required some shimming on the base unit side but we got there. Similarly, the upstand was fairly straightforward, sawing the hard oak was tough but once the pieces were right we just glued it in place. Worktop Express were friendly, good value and their machining was excellent quality. Unfortunately, some gremlins within their system attacked our order, leading to some big problems with phantom deliveries. Eventually, our worktops came on the 4th attempt, having caused quite some frustration. But aside from that glitch, we would recommend them. A fun bonus was you’re allowed to keep all your offcuts from a custom job, so the sink cutout piece got a light sanding down and is now a lovely chunky chopping board. Other offcuts are waiting for upcycling; we have a project in mind to make some pot stands with one, and the remaining large offcut will be used in a future project. We bought a sink at the same time, an underglued one, and mounted it underneath. In hindsight this was a step too far, we did it as one should with bar clamps and the right glue but it was difficult to set up exactly right without any splodges in a home environment, and even worse - it fell off after a couple of weeks the first time! Thankfully there was no plumbing damage. We reglued it and then did a second edge seal, and added some fixing battens to clamp the edges up to the worktop and avoid any peeling. It’s been sturdy ever since, but it wasn’t the best of jobs and we’d have been much more sensible to get it done by the worktop manufacturers. Overall our worktops and sink cost us £656 with no templating charge, a truly huge saving of 76% compared to £1931 of worktop and sink and £757 of templating and installation we were quoted for the fitted kitchen option. Services We feel services costs really sit outside the comparison here, because they needed doing, and doing properly, whatever we’d chosen. We had the potential to use the gas supply to the flat, but we didn’t want to because we think an electric oven is more compatible with a renewable-supplied grid in the future. We had some plumbing costs of getting the appliances and new sink linked up, these came to ~£350. The main work on the kitchen was running the new earth to allow more sockets to be wired up. This is difficult to show as a separate cost because it was tied into getting the service unit upgraded, but our electrical work costs came to £1240. We went with a very professional firm, a big outfit run well by a guy who came and looked around the flat properly and agreed to the work in detail with us in advance. This work went very fast with a team of 3 people blasting around and doing it within 1 day, and something that helped is we went round with a marker pen and drew instructions of the tasks to be done directly on to the walls, meaning that they could let themselves in whilst we were at work and get cracking with it. Everything went in as agreed, however, there was one major accident - one socket box being put in on the wall between kitchen and bathroom went into brickwork that was really quite narrow, which no-one had realised, and so the back side of it blew outward into a big hole in the bathroom wall. That was a bit of a surprise for all of us! Professionalism shone through in that they quickly explained to us that they would clean out and plaster up the bathroom, and indeed when they left they’d made sure the only inconvenience left was a repaint of that wall which we weren't too worried about. Accidents can always happen even to careful people but at least when you’re working with someone reputable you can trust them to make it right. Labour This is a key area in which we saved huge amounts, by essentially providing the labour for free ourselves. Days upon days of time were poured into the kitchen by both of us, we even got my little brother to pitch in once during a Sunday afternoon visit! Some of the biggest tasks were: Overall this represented many, many weekends of work, it was a huge undertaking. Keeping the radio loud and spirits up worked wonders. A bag of grit plaster was an absolute essential and helped us patch at so many points. It’s quite easy to mix and use, although messy to clean up. How much was this worth? Well, a direct comparison isn’t possible but for context, the quote we got gave labour costs for just assembling and installing the fitted kitchen (i.e. about 5 of the above 14 tasks plus a small part of the plumbing and electric cost) as £2551. The costs of not doing anything ourselves would probably have been so high we wouldn’t have been able to afford to do the kitchen at all. Decorating & Furniture We bought metro tiles in a duck-egg blue and white colour (see links at the bottom for details) which was cheap and simple. With 10% waste allowance, adhesive, and grout, the lot came to £254. We’d never done any tiling before so there were some tools we needed to buy, most notably the tile cutter but even that was about £30. We didn’t realise that tiling is significantly easier with larger tiles i.e. fewer to fit, easier cuts to make. So we actually had picked something fairly challenging, however, it turned out to be a really good choice for our walls - they’re lumpy in some places, but now with the bevelled edges of the tiles breaking the surface up, you’d never be able to tell. Grouting was a nuisance, as was cutting tiny slivers of tile for tiny spaces, but we were really pleased with the end result. It’s difficult to tell what it would have cost to have had somebody tile for us, we’ve put it in as £1000 as we think they would have charged a lot on labour and probably not sourced the materials as cheaply. We dealt with the problem of the overlooked window by putting some frosting film on it, giving the space the privacy it needs without cutting out light. That rose the light level in the room a great deal and cost us about £15 for the film. With the room being small, the rest of the decoration was mostly avoiding overcrowding the space. The rest of the room is painted white to keep it bright and to keep the focus on the wood and steel. We keep out bits of cookware that are either pale blue, or a contrasting orange, to work with the tiles. We got ourselves a lovely mid-century modern style dining table which extends out, so that it can be brought into the living room and pulled out to seat up to 6, yet in our little kitchen, it can sit under the window and be a good breakfast/weekday dinner table. That was an end-of-season showroom model so we got it for £150. That’s about it, other than our table and chairs the floor is deliberately left clear to allow movement in the room without it being cramped. The Verdict - Did we do it? Was it worth it? We saved a huge £8709 by doing our kitchen in our own way, bringing the whole project in just shy of £5000 - actually we assumed at the time we’d slightly overshot £5k due to the high cost of the electrical work, so getting a chance to tot it all up for this post has been a pleasant surprise! Here’s the summary of costs for both options: Item Fitted cost Our cost Saving Base units, cabinets, shelving £3,253 £930 71% Appliances £2,399 £1,312 45% Worktop templating £757 £0 100% Worktop £1,931 £656 66% Installation £2,551 £0 100% Tiling £1,000 £284 72% Common costs - Services, dining table £1,755 - Grand Total £13,646 £4,937 64% Was it worth it? Definitely. It was a lot of extra cognitive work to plan the space ourselves, and a lot of extra physical work with all the labour required. It also took a lot of calendar time, although if we’re honest that’s just how we work. We don’t really mind living in part-finished spaces and preferred to pace the work gently and enjoy doing it together. We wish we were faster, but we just aren’t, and we were learning as this is our first time! Ultimately the kitchen we’ve ended up with is worth more to us than the £13k option. Instead of something impersonal, we’ve had the freedom to consider what we need and want from the space and design it around ourselves and our tastes. When it was finally done and we got settled into it, we were delighted with how well it fits in with us both being in there cooking together, how pleasant it is to eat by that window, and how spaces are fulfilling the plans we had for them. Now our kitchen is a bright, airy space where we can turn the leeks from our allotment into hearty soups! Links Most the places we've rented haven't had enough useful storage and newer builds seem to getting even worse. Sadly, for hoarders like me, it seems gone are the days of a stocked larder and capacious cupboards. Getting furniture built in is costly, normally because it requires a skilled carpenter or an expensive tailor-made service. We'd very much like a workshop and try to make more ourselves, but with a one bed flat in London it is hard to imagine a way of making that happen... We have a niche in our flat that, although seeming a great storage space, wasn't very efficient and really just ended up being a dumping zone. We asked for a few quotes for built-in shelf storage and they were well over a grand (or more...), with quality/approach (e.g. boxes rather than open shelving) scarified to get them even vaguely near our budget. Not to be dissuaded, we decided to build our own at better quality and less than 1/2 the quotes, and try out some new techniques at the same time. The concept was simple: we wanted to have space for a few Bromptons and scaled everything to standard IKEA sizes so we could just fit it off-the-shelf affordable storage from IKEA. Starting at the end, below (right) is the finished shelves complete with IKEA boxes and two Bromptons in their new home. The below (left) shot from before unfortunately ended up being fairly common for the niche, so there is a real difference now with the new storage shelving. The build is simple. Its just plywood birch wood sheet cut to size and pinned to battens on the wall. We jumped on the opportunity to use a cool technique of laser cutting, as this gave us the ability to have any shape. We used this to give an aesthetically pleasing large radius curve on the front left of the shelving. We also decided to leave the soot of the laser cut edges unfinished as we like the contrast with the white IKEA boxes. Initially, we tried to get a sawmill to just cut to our measurements and that would have been cheaper, but in London we struggled to get someone to take our order (even if websites said they would...). We found the laser cutting service allowed us to neatly cut out slots to clear the wiring channel and other obstacles. The metal legs at the front on the left are from IKEA and so are the white paper boxes. Whilst looking for photos of the shelving I even found a few (below) of the niche earlier on in our renovation. The material we went for was (PEFC certified) 12mm birch plywood chosen for strength and finish. We took lots of measurements (see our tips below), then used some Computer-Aided Design (CAD) software to pull together a design to fit around the space, sizes of IKEAS boxes/Bromptons, and obstacles (wire routing & fuse cabinet). The CAD software we used was Solidworks which costs and we had access to, however on projects since we've used software that is available for free (Fusion 360). Below are a few images of the final design. Tips: 1. Measure really carefully and at multiple heights & depths in case the walls aren't straight. 2. Simplify your install by slightly undersizing all the shelves - ours had a gap 1/4 the batten width - which allows the shelf to be lined up visually then screwed into battens. This is quicker than having to plane shelves for a perfect fit. Also wood expands and contracts so small expansion gaps are sensible. 3. When deciding the height between shelves remember to allow for the thickness of the shelf above and battens above. 4. Shelves battened out on 3 sides are strong, shelves battened out only on the back like the ones on the left of our alcove have a weak floating corner. We solved this by screwing little mending plates at the join on the underside to discreetly tie the weak corner to the strong shelves. 5. When marking out for battens, pick one area of one wall to be your primary place to measure height, and use the spirit level to continue the marking out round the corners. This will keep your shelves level even if the floor is not. Once the plywood arrived, we started battening out the support for the shelves. For this we just used cheap Wickes' Whitewood PSE Timber - 18 x 28mm x 1.8m. This part of the job took a long time as all the screws needed rawl plugs into the masonry. We also finally got around to buying a wire/metal detector, which we should really have got sooner in our DIY exploits... The left hand wall was definitely the most challenging bit. The fuse box and old metal cupboard could not be moved or altered. The lack of a wall at the front, meant the shelves needed legs for support. After looking online, we saw that there were lots of options but that IKEA's kitchen leg look nice and was very well-priced (£16, IKEA UTBY). To finish, the extra shelves were put into the lefthand boxed out section. These are resting on internal battens on the plywood upright box section and use "cheating corners" (Wilkinsons' Fixit Blocks) to hold in place. Mending strips (two per shelf) were added to join the back and lefthand shelf sections. We are very pleased to have rearranged this space so that it supports us using cycling as our main transport with somewhere to store our bikes conveniently, and so that we can tuck away all the bulk low-plastic household goods we get from Suma (as we've blogged about before). We're very fond of our new built-in shelving, and decided to do bookshelves in our lounge that would gain us floor spaces and be affordable too. For this we decided to take a different "IKEA-hack" approach & i'll pull together a blog on it soon. In case any of this is of interest, the table below gives links for what everything cost and where we bought. In total it was ~£430. None of these links are affiliated. Plastics reduction has really caught public attention recently, with the "Blue Planet" effect and with some people in the UK giving up single-use plastic for Lent. LittleEcoFlat doesn't observe Lent particularly, but this wave of interest does tie in with one of our aims for around a year now to reduce our plastic waste. So we thought we'd share some changes we've made - if any of you have been ditching the disposables and want to keep your momentum going, maybe some of these ideas will be useful for you! We were surprised to see the theme of toiletries and cosmetics come up repeatedly, and realised we were wasteful here because we were stuck thinking this area "doesn't count". Finding that my actions and my ideals clashed made me feel pretty awful, but I think overall it's best not to get disheartened; looking for these blind spots in your thinking is an ongoing part of being human, and an opportunity to grow. (Apologies to anyone who received a notification about the draft version of this article - a mess-up on my part and I hope you enjoy the finished article below) The biggest gains we made were by "levelling up" from recycling to making sure the plastic doesn't enter the house in the first place. But recycling is a good, simple place to start. If you want an easy guide you can find videos on how to recycle different items from recyclenow linked here, and a guide to what recycling bins you get and what you can put in them here, just enter your postcode here. At LittleEcoFlat, we have drop-off points but no specific collections from the household, so we take everything off to the larger neighbourhood bins. We have set up a stack of IKEA Sorteras which sort all our cardboard, plastic, aluminium, glass, and tetrapak. Tetrapack, WEEE waste, other metal, and batteries all go to special collection points in the local area. Wood and any useful cardboard goes to our allotment to be reused. Some plastics are easier to recycle, like PET, polyethylene, and polypropylene (a nice summary linked here). Others are hard to recycle, like Polystyrene. Generally rigid plastic packaging is single-type and recycle-able. But foams and plastic films/wraps are rarely separated for recycling or incineration and end up in landfill. Mixed materials also pose a big issue; any paper or card which is plastic film coated (tetrapak, disposable coffee cups) is very difficult to recycle or compost, and needs to be kept separate and taken to a special drop-off point. Setting up a food group last year allowed LittleEcoFlat to join LittleEcoTerrace's habit of getting all the laundry liquid, fabric conditioner, washing up liquid and hand wash in bulk. Our 5 litre containers massively reduce the plastic coming in with these products, and we use a funnel and re-use a set of small containers to decant it out for easy use. Not masses has changed here, buying food in bulk and storing it in glass jars means the kitchen is a fairly low plastic zone. For years we used emptied jam jars of various sizes, last year we decided it made sense to get a "proper set" from IKEA. Early in the year we completed a gradual shift away from tetrapak to plastic juice bottles - easier to recycle. We still have tetrapak cartons for the soya milk. Our loved local Co-Op seems to be lagging behind other supermarkets in switching away from tetrapak juice but we hope they will soon. We bought ourselves an infusing teapot to make it really easy to use loose leaf black tea instead of teabags køb cialis. You may be surprised to learn (I was!) that most paper teabags have plastic in the binding which doesn't decompose and will leave plastic fibres in the compost. We use allotment-grown sage and mint for herb teas last year and aim to up production this year. The biggest change for us was installing a shower dispenser for shampoo/bodywash and conditioner. We bought 4 x 5l containers from Suma in grapefruit and in rose scents, rather than 40 x small bottles. Most of my extra odds and ends (moisturisers, body scrubs, face masks etc) are from Lush and they sell things in paper or take the bottles back. With 5 empties = 1 new face mask this is definitely my favourite way to recycle. We skipped the whole microbeads thing. It genuinely confused me why companies thought we would want plastic rubbed all over us, and I feel it was irresponsibly marketed. If you are after a good replacement exfoliant try making a sugar scrub or buying something where the exfoliating media are biodegradable like rice granules. For toothbrushes, the plastic handled and bristled ones are difficult to dispose of responsibly and are one type of plastic waste found in the great ocean garbage patches. Initially we landed on an alternative of bamboo handled ones but unfortunately matters are rarely simple and we found out from this article that some of the ones which we thought were plastic free actually have plastic rather than bamboo viscose bristles. We're taking caution now and aiming for options with genuine bamboo viscose bristles, or pig bristles, the latter of which obviously won't work for vegans or vegetarians. When it comes to makeup, I have a personal dislike of most of it, so this doesn't generate much plastic. I use a couple of lipsticks, eyeliner kohl, and solid perfume. I have a lot of nail varnishes because it helped me get my nails long and nice, but overall these and the remover are stuffed with nasties so more recently I've stopped using them and use a buffer bar which just keeps them neat and short. I work with a lot of grease and dirt so my nails get stained if I grow them long, if anyone has a handy eco tip for avoiding that do let us know! So, that's our general household plastic reduction efforts, I hope you have found something of interest. The last section of this article is about a large source of waste for many women, which is monthly products like tampons and sanitary towels. If that's not something you find relevant or interesting, this is your stop, and thank you for checking out the article! I wasn't initially sure about sharing this bit but it's important; well performing monthly products are critical for a huge chunk of humanity, but the main options - conventional tampons or conventional sanitary towels - create large amounts of plastic waste. The Women's Environmental Network says in their "Environmenstrual" campaign that pads are around 90% plastic. It's not a practical or sustainable situation, and women need functionally excellent options which don't commit them to such heavy waste production. This is one area that I was highly resistant to looking at for many years, I lacked confidence that eco alternatives would deliver and I didn't want to take risks. This is a personal area so I'm glad I took time and came around to considering it in my own way, but I needn't have worried. The option I use now is much more comfortable and to my real shock, much more pleasant and sanitary-feeling. Specifically I get less irritable skin during my period, something I'd incorrectly chalked up to my contraception option not my menstrual option. I now feel that the options in shops impose this idea that everything needs to be clean perfect white and seem desperate to work against, not with, something that's a reality every four weeks for a huge chunk of the population and isn't all that bad. I'm not sure how this has happened but it's rather odd. I'm sure women will have been involved in development of the plastic-y options too, but it feels like a new wave of products are more loudly and boldly being designed by women for women. It feels like today, many of us are becoming quite distant from the origins of the food we eat. We’re not shopping in the butcher’s, the baker’s and the grocer’s, and this means in general our food is travelling further to get to us, and we know less about the wellbeing of the people who make it and how they make it. It’d be easy to bemoan the march of the supermarkets and a valid response could be to only shop local for some. However there are other factors here: mass food has become more varied, less expensive, and its quality is policed with exceptional rigour (...even if taste is occasionally the innocent bystander hit by this focus). Thankfully there are lots of gems of local producers all around the UK, but I've found since moving to London trying to shop local now carries a hefty price tag. It seems to have become a pretension. Shopping eco and organic similarly can get pricey very suddenly, with alternative supermarkets like As Nature Intended and Wholefoods stocking hard-to-find eco goods in London but also charging well above the odds for them also. So, how do you get your diet and groceries to be low food miles, fairtrade, organic, low meat, eco-friendly, varied and exciting, and yet not cost you an utter fortune? Time for a clever co-operative to step in. Suma have been running since the 70s and they are one of the most successful workers co-operatives in the UK. Their business model is very interesting; their main purpose is to sell organic, fairtrade, and environmentally friendly groceries wholesale to shops. However they also actively encourage sales to food-buying groups; individuals banding together to get to the same Minimum Order Value (MOV) as a shop would have, and then sending through one group order. Suma have strong principles about what they will and won’t stock; they are strict about products being environmentally sensible, paying a fair price to those who grew/made the food (whether that is Fairtrade label or other forms of worker protections), they don’t stock meat, and most (but not all) of their food is organic. Over the years Suma have grown and are now an experienced brand in their own right; many of their staples are Suma branded and sourced. Suma practices what it preaches by paying all of its staff an identical basic wage of £15.60 per hour (~£32k p.a.) regardless of role, and all staff equally share profits and have equal stakes in deciding how the business develops. Staff are encouraged to turn their talents to whichever combination of roles they prefer; this radio program said tasks like picking and stacking are partially on a rota, but equally some workers are more accounts-based and others are more packing-based. I’m really fascinated by their model; it’s unabashedly utopian and logically one would say ahh, economics will mean one day they won’t be able to fill a skills gap and will have to pay one person more, then it will all fall apart. However they’ve been doing just fine for the past 40 years. My instinct says the answer to the puzzle is they’re offering a model of diversity and equality that really is worth more than money to some very capable people out there. Well, anyway, if you just read that and want to join the utopia, they’re over in Elland, West Yorkshire, and they’re hiring as I write this. Back to the food; Suma stock a huge range of grains, staples, canned vegetables, nuts, fruits, drinks, oils, dairy goods, toiletries and cleaning products. If you have a special diet eg. low meat, dairy free, gluten free, vegan, they have a ton of specialist foods and meat replacement foods. Quality is very high and prices are comparable with budget supermarkets, i.e. it may not necessarily beat Aldi/Lidl/Asda/Morrisons but it’s great quality and great ethics for that same price. It’s excellent value. There are a few other co-operatives doing something similar: Lembas in Sheffield and Rainbow Wholefoods in Norwich are notable examples and similarly have an ethos of equality and co-operative running. They’ll also sell in bulk to food buying groups. I believe there are a few more but I don't know them by name, feel free to comment and flag some others up. A food buying group is where a bunch of individuals get together and place group orders for food, so that they can access it cheaply. Some food buying groups can be purely cost motivated, but around the UK there's a really big trend of these groups also being about getting more environmental, more ethical products, particularly if you live somewhere where those items are not in the shops around you. The group normally has a focal point that makes it a natural little community; a certain cafe, or school, or allotment site. The group can be a co-op, with a constitution, members, bank account - or equally it can be a Whatsapp group and one person willing to have a pallet delivered to their house now and then. When I was little we used to get our Rainbow Wholefoods supplies (inc. soya milk and un-sulphured apricots) from the delightful Fruits Of The Earth in Upper Orwell Street, Ipswich. It was my favourite shop because its smell was just incredible, all of the cooking spices oozing together, and to a child it seemed stunningly exotic. I have a treasured memory of watching the Chinese New Year parade passing whilst we stood on the high doorstep of the shop. Unfortunately for us this rarity in Ipswich disappeared, leaving us without a particularly good source of wholefood products for a while. A few years later my parents joined the allotment's food group - this is a really popular type of food co-op - and used to order in all the bulk items that a big family gets through; pasta, laundry liquid, loo roll, tinned tomatoes. When we lived primarily in York, we were part of the University of York People and Planet Student food co-op (SCOOP, @YorkSCOOP). They have a sophisticated setup where they run a price-by-weight shop called SCOOP at cost out of the University. Most food groups don't have enough admin people to do this, but the students provided a big enough group that it made sense to "pony up" for the bulk and let people come and grab what they want. If you wanted something rare you might have to commit to taking a whole case of it before they'd order it in, but most stuff was very easy to get from there. Now we're in London and surprisingly we've not naturally drifted into any food groups here. It seems to be a bizarre desert for food groups. For a while that puzzled me, but I've noticed a few factors in the dearth of food groups here: Specialist diets have become normal - It used to be difficult to get dairy free/gluten free/meat replacement/vegan fare in most UK shops, and seeking out somewhere that would sell these to you would be the thing that originally nudged you into the wholefoods universe. Now Quorn is everywhere, and with 1/3rd of British customers now buying Free From products, even my convenience shop stocks soya milk and gluten free bread. It's far easier to get this stuff. Combo of availability and money - London already has a lot of shops catering to eco food and cleaning products, they charge a lot but they are convenient and people here get constantly psychologically battered into thinking food costs a lot of money, so they don't seem to notice the markup. Don't talk to other Londoners - our rep across the UK for ignoring each other in London is not entirely undeserved. Our community is simply too large to emotionally cope with, so I've noticed socialising becomes more focused; there's a club for literally any activity, but x club only does x activity specifically. Food groups seem to arise more naturally where the community is smaller so a successful club/society needs to accommodate a more disparate group of people attending and be a focal point for a broader range of activities. People then chat more about neighbouring interests and work out they'd like a food group. Read through Suma's "Start your own Food Group" guide to find out more. I used their web resources for lots of advice and help and found they were excellent. They had a "Top 100" list, which helped me show the possibilities to people unsure about jumping in. Musette is the food co-op I set up for the employees of Brompton Bicycle Ltd. I’m really proud of being able to set up a co-op of our own, and I’m thoroughly impressed with how enlightened an employer Brompton has been through the process. I'm also just blown away by how stunningly friendly Suma are as a company, and as individuals, which I'll say more about in a second. I'll do another post sometime describing the nuts and bolts of how we run, and how orders come together, but for now I want to just chat a bit about how Musette came to be. The food group grew out of necessity; LittleEcoFlat gets through lots of TVP, soya milk, Boullion powder, Ecover washing and cleaning things, tinned chickpeas, and we were getting this all from SCOOP. As we spent more and more time in London we were having to take more and more of these foods down on the train from York. It's a ridiculous situation that this was still so much cheaper than buying those things here. So we had a think about who would make a good group; we thought maybe the allotment, but we were concerned on two counts. First was we are newbies. Rocking up and then starting to organise people who've been doing this a lot longer than you is rarely wanted or needed. Second is the allotment group is quite loosely connected and its organisation appears mysterious from the outside. Our secretary clearly has an excellent handle on things, but we really lacked the confidence that we could get this gang pulling together, communicating well, and placing big enough orders. Instead I started to think about my workplace. The factory is massive; pallets and lorries coming and going is the day-to-day reality. My immediate colleagues include several who love to cook and like good quality ingredients, and the wider company is big and could get a minimum order together even if it's only a small % buying one or two items each. My colleagues include people who eat low meat, no meat, organic, palm oil free, and who use environmentally friendly laundry liquid etc., making them a decent fit for Suma's catalogue. Brompton isn't a campaigning organisation and doesn't have an environmental agenda, but the staff is heavily made up of cyclists and that has a correlation with many of us feeling quite environmentally conscious. My first step was to gently float the idea hypothetically to a couple of close friends at work. They seemed keen and thought others would be too. After building up my confidence a bit, I went to our MD and pitched for permission. My argument was that his employees get access to a seriously good deal on good quality food, and all it's going to cost him is a pallet spot for 1-2 days which isn't even going to be a hassle. He didn't know much about Suma or food buying groups but was immediately keen. He gave me permission and said this is the kind of employee community activity they want to have, he was really encouraging. I'm glad I spoke to Brompton's management really early; if you are considering doing something similar, I would recommend doing it this way. I felt it was important to show my respect for the company before steaming ahead, and it definitely set the right tone of enthusiasm. I also appreciated that the MD showed his support by making sure he joined in on the first order, and spreading the word about Suma. The first order was a solo affair on the admin side; I phoned Suma and set up an account alone, and did the promoting, order collection, money admin. When I first spoke to Suma the size of the task felt really daunting. But I needn't have worried - I had the pleasure of Lynne (from the New Business Team) taking me through the process with warmth and charm. She signposted me to all the info I needed and it genuinely was really easy to get started. Something I hadn't anticipated was Suma were so excited by Brompton getting in touch. Lynne was really impressed that our staff were up for this sort of thing, and Suma staff have a great love for cycling. Regardless of that, everyone I've had contact with at Suma has made it clear that they're so happy to have us, and that they genuinely love new customers coming along and getting to include them in something everyone at Suma deeply believes in. My first order was a bit gunky, I made mistakes, I didn't know which foodstuffs were VAT chargable (it's seriously weird). I didn't check if things were in stock, and on the first order you don't have a credit line yet which means you need to pay for everything and then process a refund for anything which isn't able to be sent for whatever reason. But Brompton staff were excited and positive, whilst Suma staff were quietly efficient and dealt with everything very smoothly. The order was a big success overall, people loved it and made it immediately clear that they wanted to do it again. Meanwhile, the lady who packed our pallet for us slipped in a handwritten note which we proudly put up on the noticeboard: Big love to Brompton Bicycles! Best in the world! Jane, Suma xxx Thank you Jane! After that there was a long hiatus due to me getting married, which rather maxed out my admin capabilities. But when I got back, we set about creating Musette. It's a constituted co-op with four Brompton employees making up the management committee. I'm chair and realistically I still do most of the order side, but it's lovely having the others to seek advice from, to help publicise the group, and to help me split out the goods when they arrive. I wanted to set up a full-blown co-op, rather than an informal group, partly so that the admin wouldn't all fall on one person, but mostly so that I'm not handling loads of my colleagues' money all on my own. The orders can easily break £1k each, and whilst my colleagues clearly have trust in me and have been happy with my management of the money, having a co-op means it's more accountable and transparent if any confusion ever did arise. Best to keep a healthy boundary between work world and money world. The name refers to a musette bag from the world of road cycling, which is a light cotton bag with a very long strap so it'll sit on the rider's back easily, filled with snacks that gets chucked to pro riders in the feed zone, or generally taken on rides to snack from (See also: nosebag, bonk-bag). It took us a long time to come up with it, we were initially trying for a bad pun or slightly naughty acronym, but being a co-op based on the intersection of bicycles and food, Musette is such an appropriate name. Together with the committee it's going really well. The hardest thing about it is that it involves payments and so people forget, or don't really want to pay, and you have to keep firm about the boundaries there. We've set a simple rule of payment before order, and the order's on a hard deadline. If anyone misses payment, their stuff doesn't get ordered, but we're really gentle about it and encourage them to try again next order. Overall this experience has been excellent. LittleEcoFlat has enough food tucked away in it to weather the apocalypse, and I've gotten to see the enthusiasm from both Brompton and Suma employees. It reinforced my feeling that I'm really lucky to work at a place where people are interested in having a community, and are interested in having integrity and principle in how they live. I had no idea how a community that isn't primarily eco-focused would take to Suma; but it turns out my colleagues are open-minded and interested in the world, and they bloomin' love cut-price pine nuts.Buzzing with Ideas
1. Cut your lawn less often
2. Add some pollinator favourites to your garden

3. Plant a big variety

4. Grow your collection from seed or plant swaps
5. Make bee hotels for your new garden residents

And finally, guess what type of Urban land has been found to be the best for biodiversity?
Cooking the books - tricks we used to get 2/3rds off a new eco kitchen
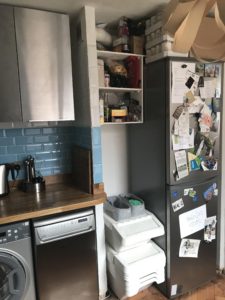
Where we started
The conventional route
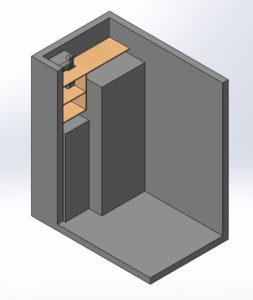
Measuring up
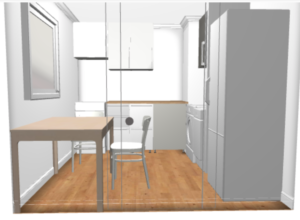
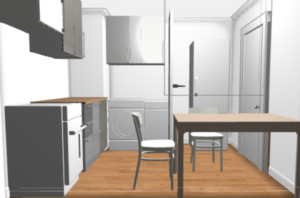
Greater than the sum of its parts
Base Units, Wall Cabinets & Doors

Appliances
New for Old
Worktops


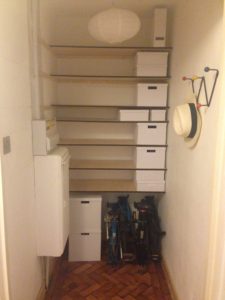
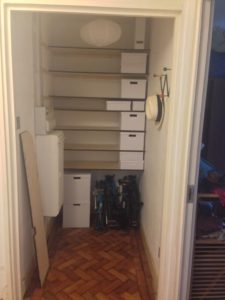
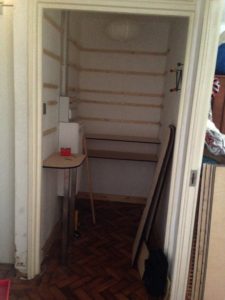
A #shelfie using lasers - affordable and bespoke built-in shelving
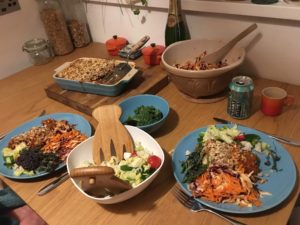
The end result
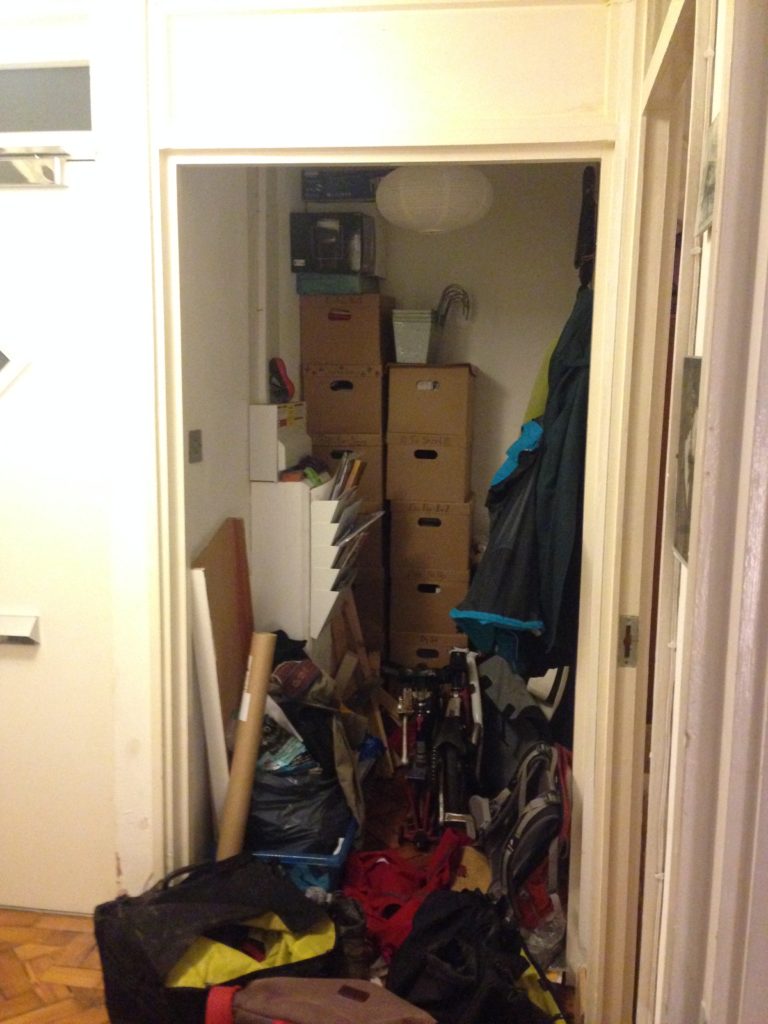
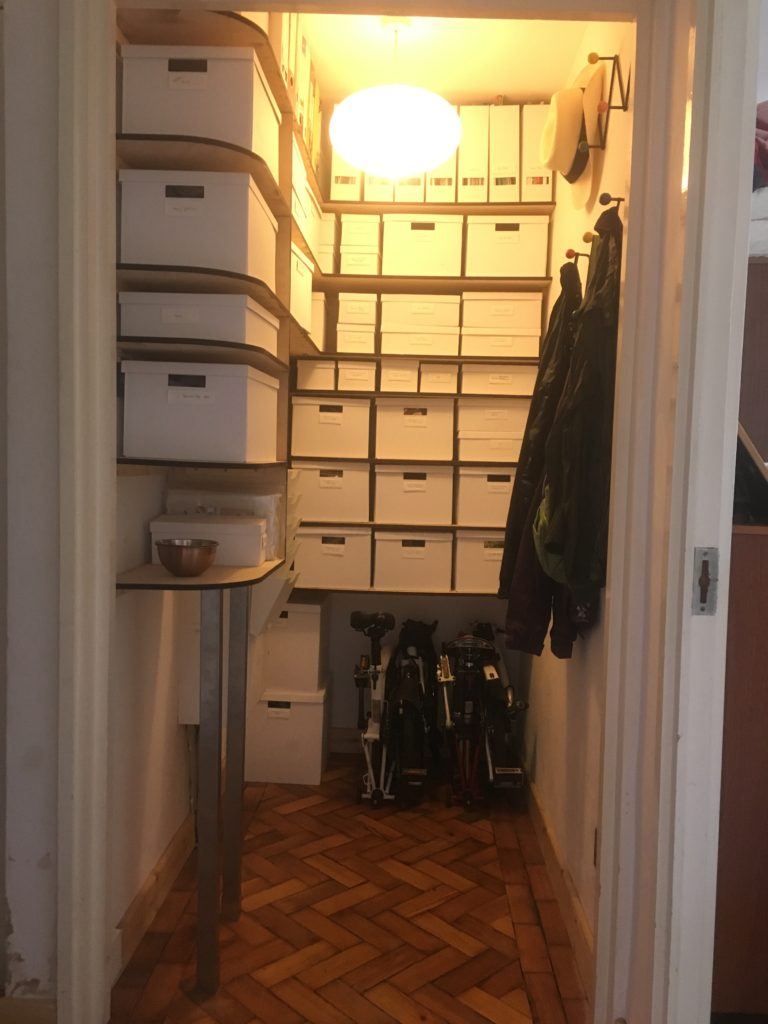


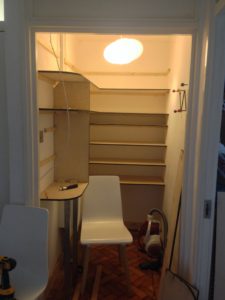
The build


Next projects
Links / the gory details
Losing our bottle - long-term plastics reduction

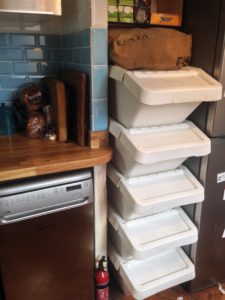
Reduce > Reuse > Recycle
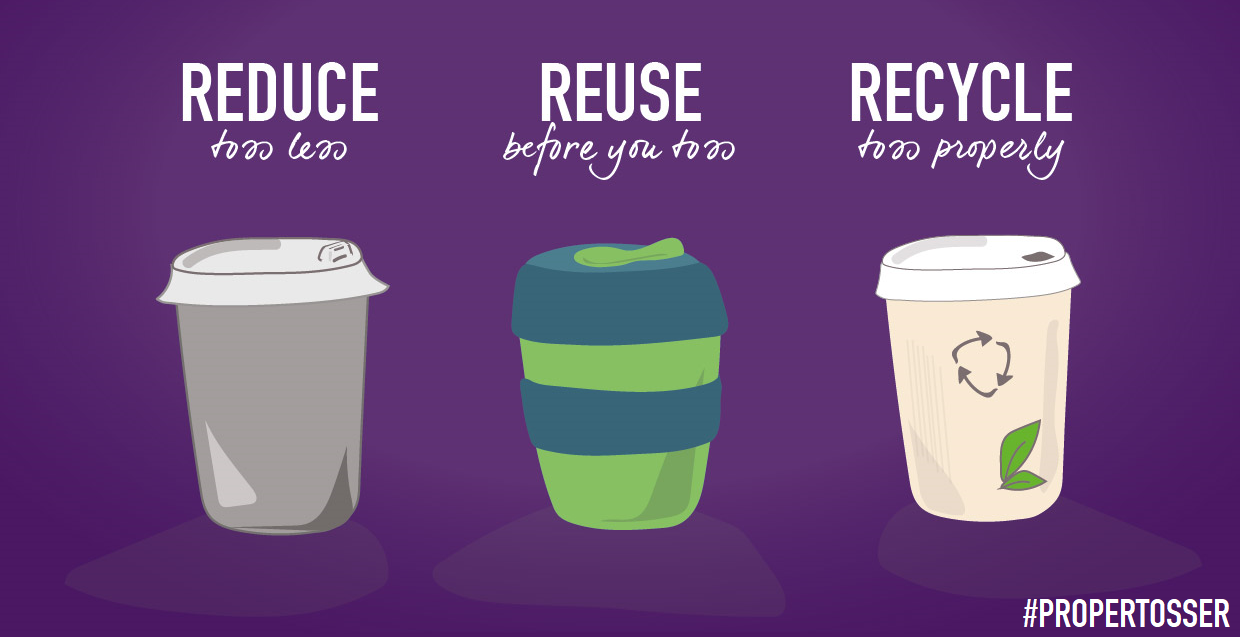
Not all plastics are equal
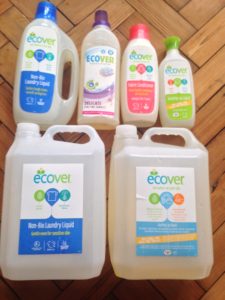
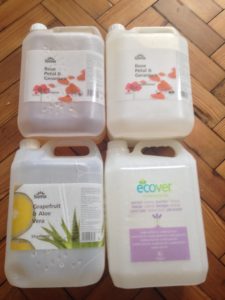
Cleaning Products
Food


Toiletries & Cosmetics


Point where the article diverges
Monthly products


Links
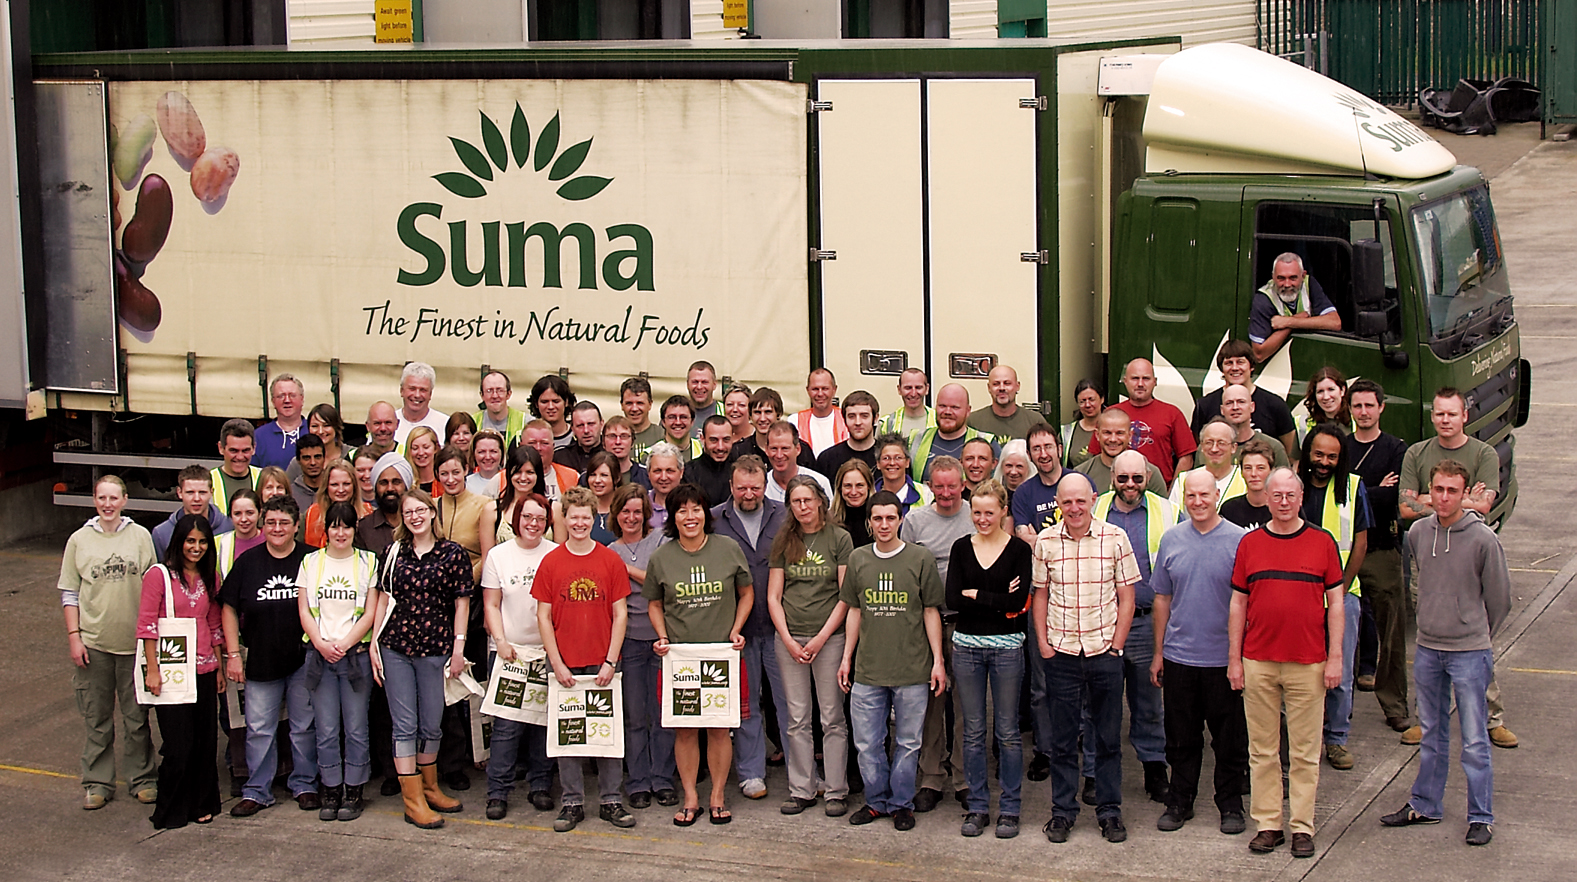
Now for Suma-thing different
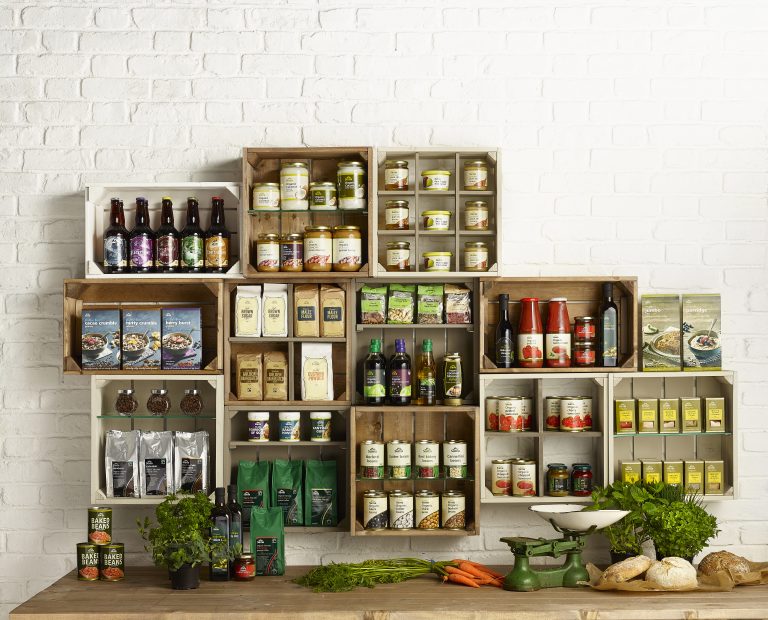
What is Suma?

![]()
What is a Food Buying Group?
![]()

What do you need to start a food group?
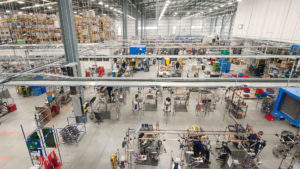
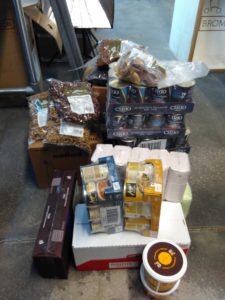
Our food co-op: Musette


Links
